Add content to a section with the editor
Add text, media, quizzes, and attachments to a section with the editor, then publish your changes or reset them.
This article assumes you've already created a course and its first section. See Build a course with sections and chapters if you haven't done that yet.
Every section's content is built in its editor — a block-based, rich-text editor that autosaves as you work. Click a section in the course sidebar to open it.
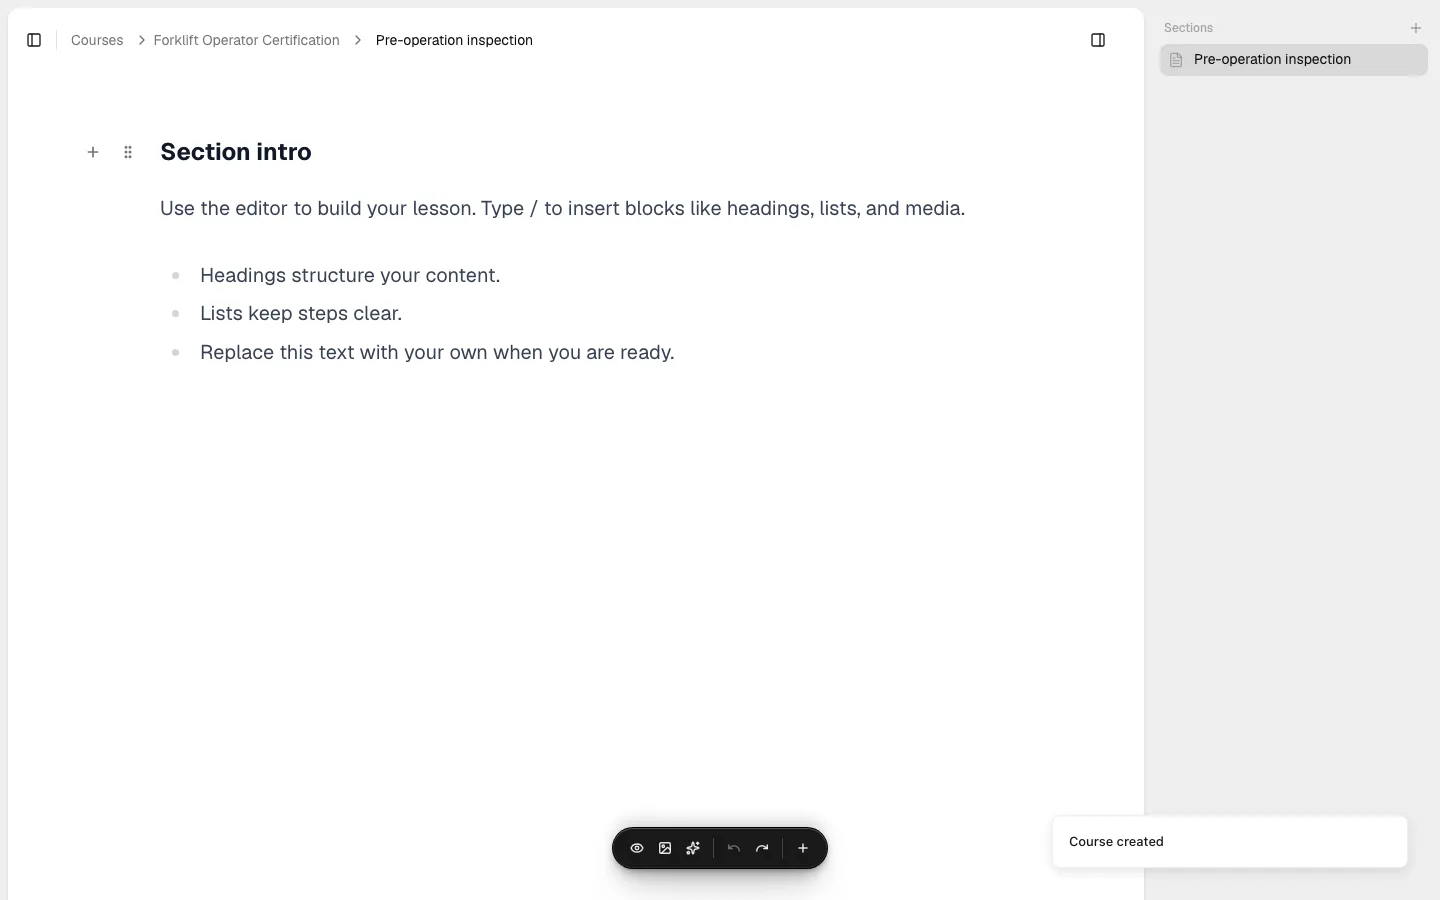
Only a course's very first section starts out with placeholder starter content you can edit or delete — it's there to show you what's possible, not something you have to keep. Every section you add after that opens empty, ready for you to build from scratch.
The editor toolbar
A floating toolbar sits at the bottom of the screen while you're in a section:
- Preview mode (eye icon) — opens a live preview of the section the way a participant would see it.
- Media Library — opens your organization's file library in a side panel. See Browse the organization file library.
- AI Tools — opens the AI assistant.
- Undo / Redo — step backward or forward through your recent edits.
- + — opens the same add-content menu described below.
Add content to a section
There are two ways to open the add-content menu:
- Type
/anywhere in the editor. - Click the + button in the floating toolbar.
Either way, the same menu opens, grouped into AI, Elements, Media, and Quizzes:
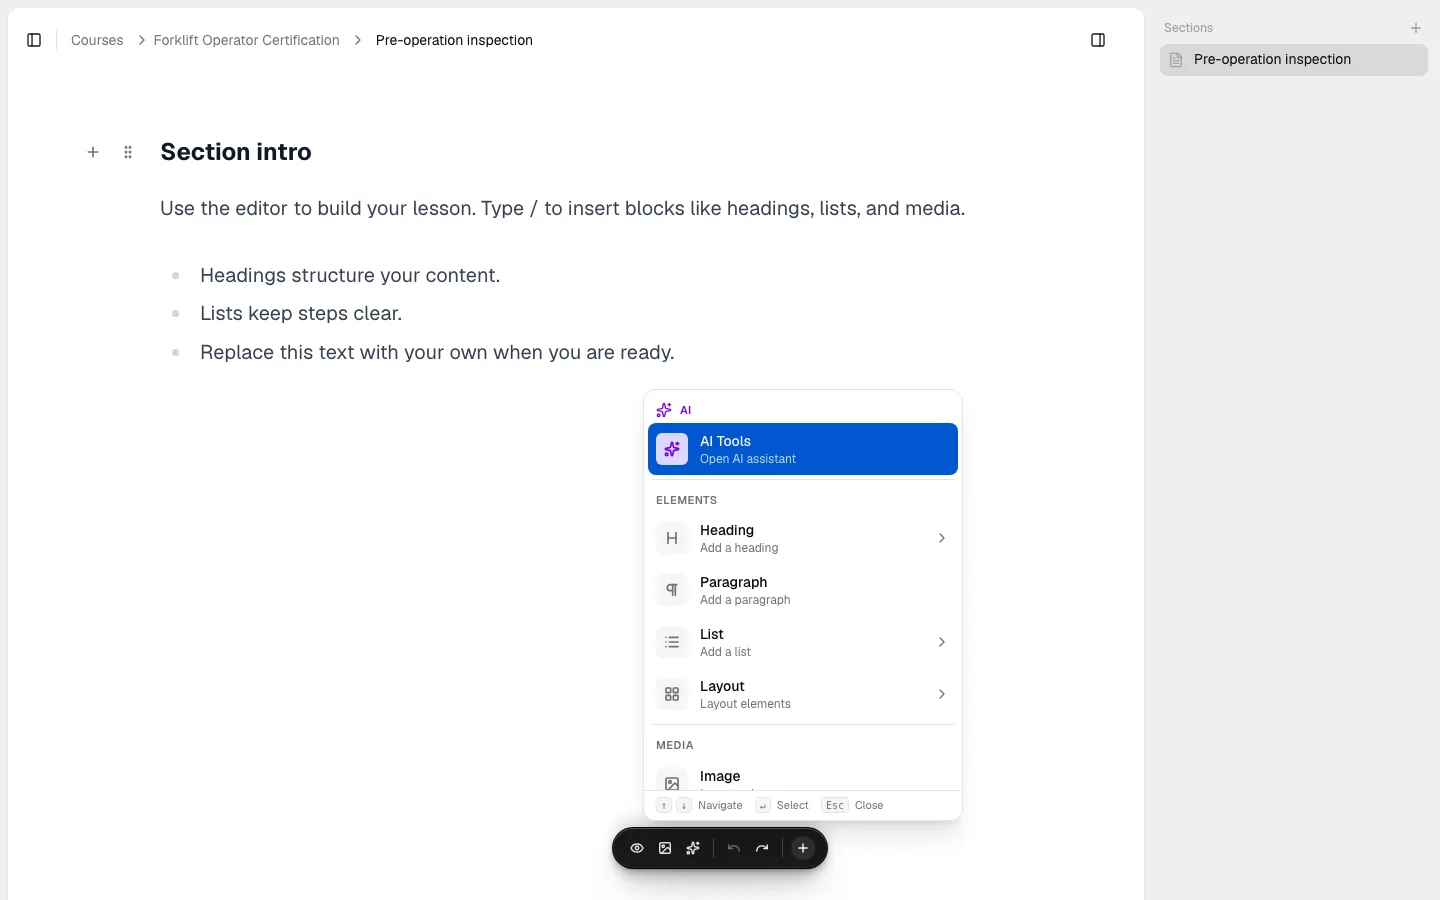
- AI — AI Tools opens the AI assistant, the same one the toolbar button opens.
- Elements — Heading (1–3), Paragraph, List (bullet, numbered, or task), and, under Layout, Blockquote, Code Block, Table, Columns, and Divider.
- Media — Image, Video, Audio, Attachment, and Embed.
- Quizzes — Multiple Choice, Multiple Response, and Fill In.
An Audio option may or may not appear in the Media group, depending on your account.
Add media: upload a file or select one from the file library
Choosing Image, Video, Audio, or Attachment from the Media group inserts the same kind of block: a placeholder that offers a choice between uploading a new file and picking an existing one.
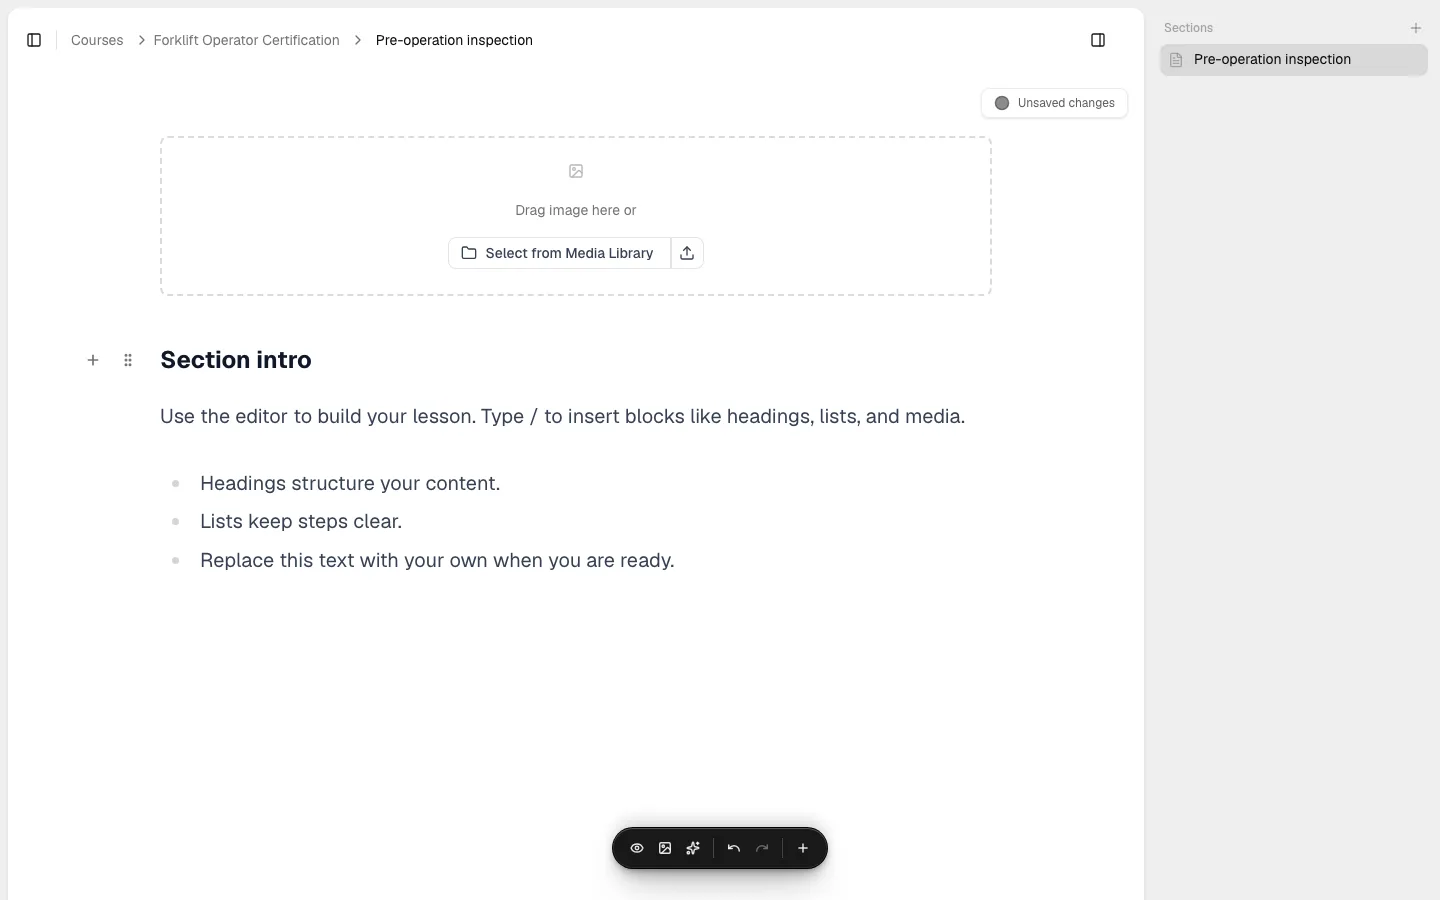
- Select from Media Library opens the file library so you can pick a file already in your organization.
- The upload icon next to it lets you upload a file straight from your device instead — it's added to your organization's file library and inserted into the block in one step.
- On a Video block, a third icon lets you embed an external YouTube or Vimeo URL instead of uploading a file.
For the full details of searching, filtering, and uploading inside the file library itself, see Upload and select files.
The Attachment block is different from the course's Attachments tab: it creates an inline attachment that lives in this section only, downloadable by anyone viewing the section — it doesn't appear on the course's separate Attachments list. See Course attachments for that distinction. A directly uploaded attachment file must be under 300 MB.
Add a quiz question
Multiple Choice, Multiple Response, and Fill In from the Quizzes group are added the same way as any other block. See Add tests to a section for how to configure questions, options, and correct answers.
Saving happens automatically
There's no save button. A status indicator in the top-right corner of the editor tracks the state of your last edit: Saving..., then Saved! — or Unsaved changes while a save is pending, Retrying save... if a save attempt failed and is being retried, or Oops! Could not save your changes. if it keeps failing.
Publish your changes or reset them
Once your course itself is published, any section with changes that haven't been published yet — even a section that's never been published before — shows a Publish changes button in its header.
This only applies once the course has been published at least once. If your course isn't published yet, publish it first — see Publish a course.
Publish changes opens a dialog:
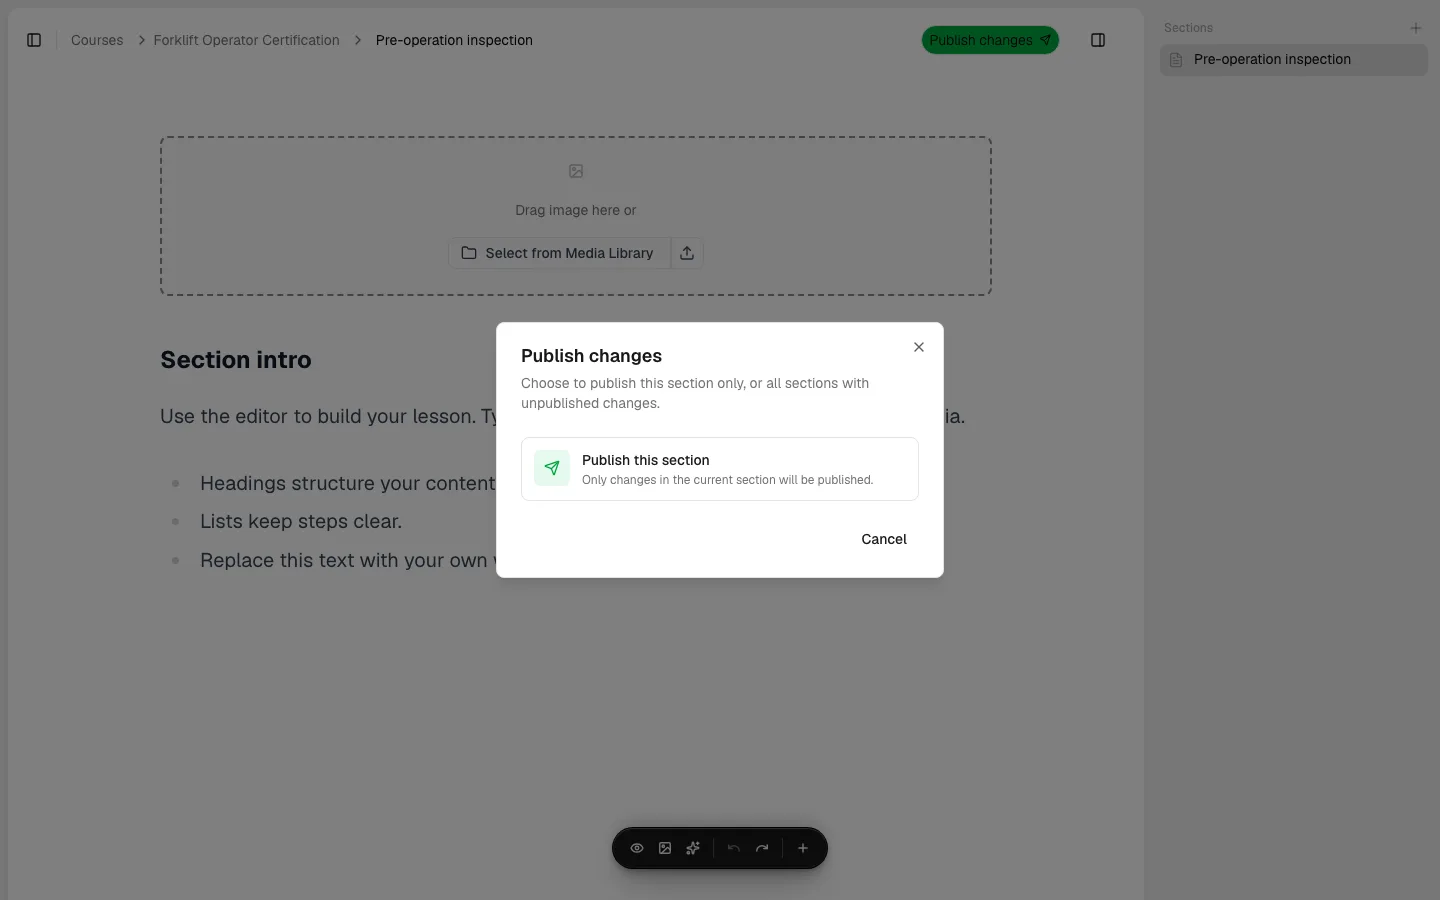
- Publish this section publishes only the section you're currently editing.
- If more than one section in the course has unpublished changes, a second option, Publish all sections, also appears.
A reset icon appears next to Publish changes, but only once this section has been published at least once — it opens a matching dialog to discard changes made since that last publish:
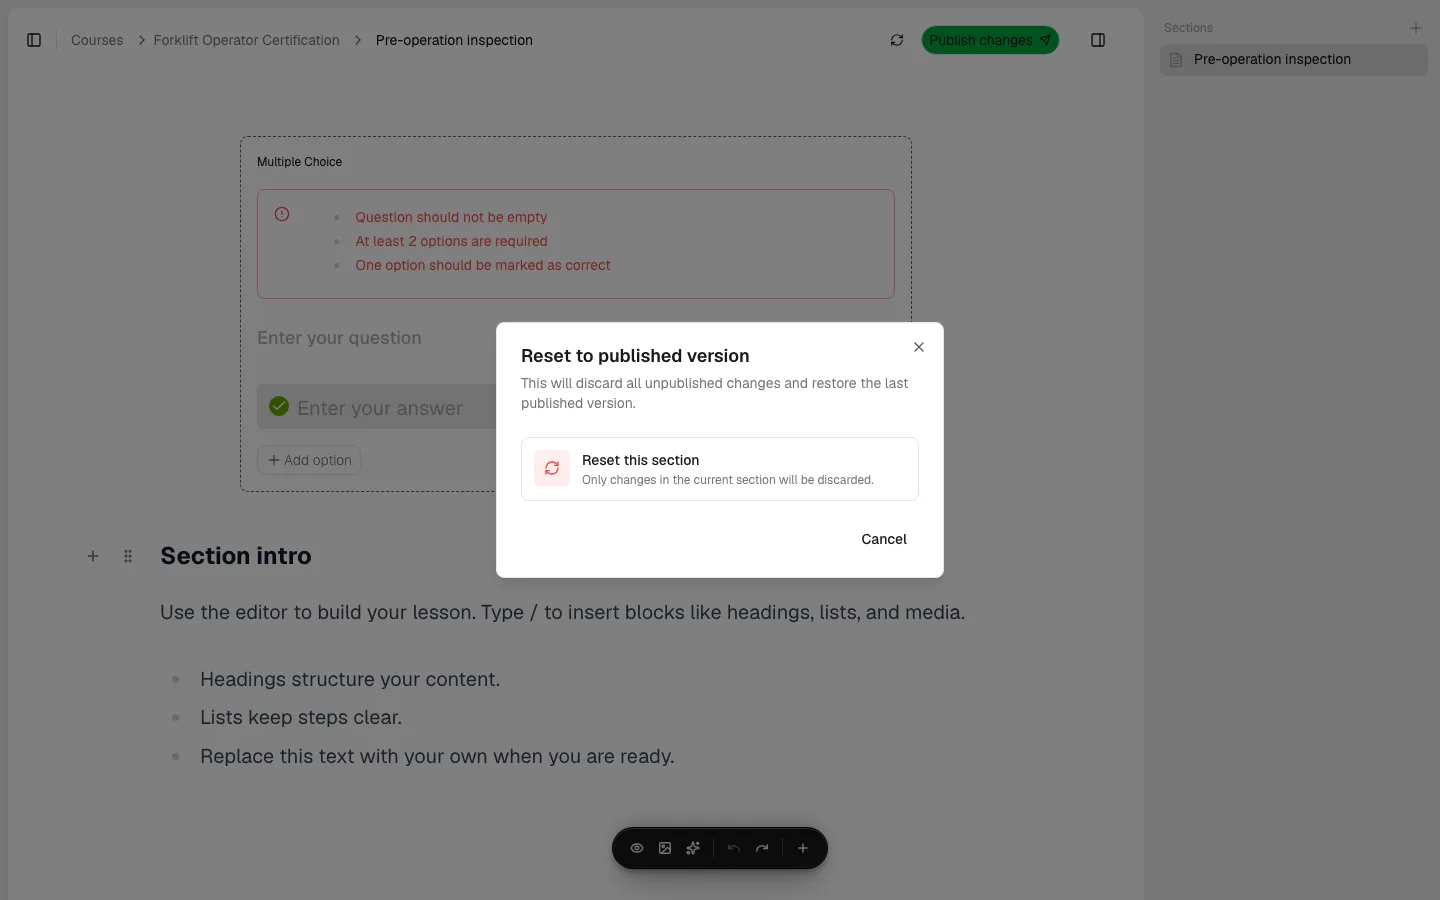
- Reset this section discards this section's changes since it was last published and restores the published version.
- If more than one section has unpublished changes, Reset all sections also appears —
it requires typing
confirmbefore it can be used.
Resetting can't be undone. It permanently discards every change made since the section was last published.
Next steps
- Add tests to a section to configure quiz questions in detail.
- Upload and select files for the full file-picking flow.
- Course attachments to manage course-level downloadable files, separate from inline attachments.
- Publish a course if your course isn't published yet.
- See the FAQ for answers to common questions.
Frequently asked questions
Publish a course
Step through the four-step publish wizard — organization profile, course details, pricing, and confirmation — to make a course available to participants.
Invite and manage course participants
Invite people to a published course by email, then track who's registered, invited, and how each participant is progressing.