Build a course with sections and chapters
Add, rename, reorder, and delete the sections and chapters that make up your course content, and turn chapters on for longer courses.
This article assumes you've already created a course and its first section. See Create a course if you haven't done that yet.
Every course's content lives in sections, and every course always has at least one chapter holding them — even if you never turn chapters on. Once your course has a section, the right-hand sidebar shows a content tree you can add to, reorder, and clean up as your course grows.
Add a new section
- In the right-hand sidebar's content tree, hover over the chapter you want to add a section to. An Add section button appears next to its name.
- Click Add section. A dialog titled Add section opens with a Name field.
- Enter a name and click Save.
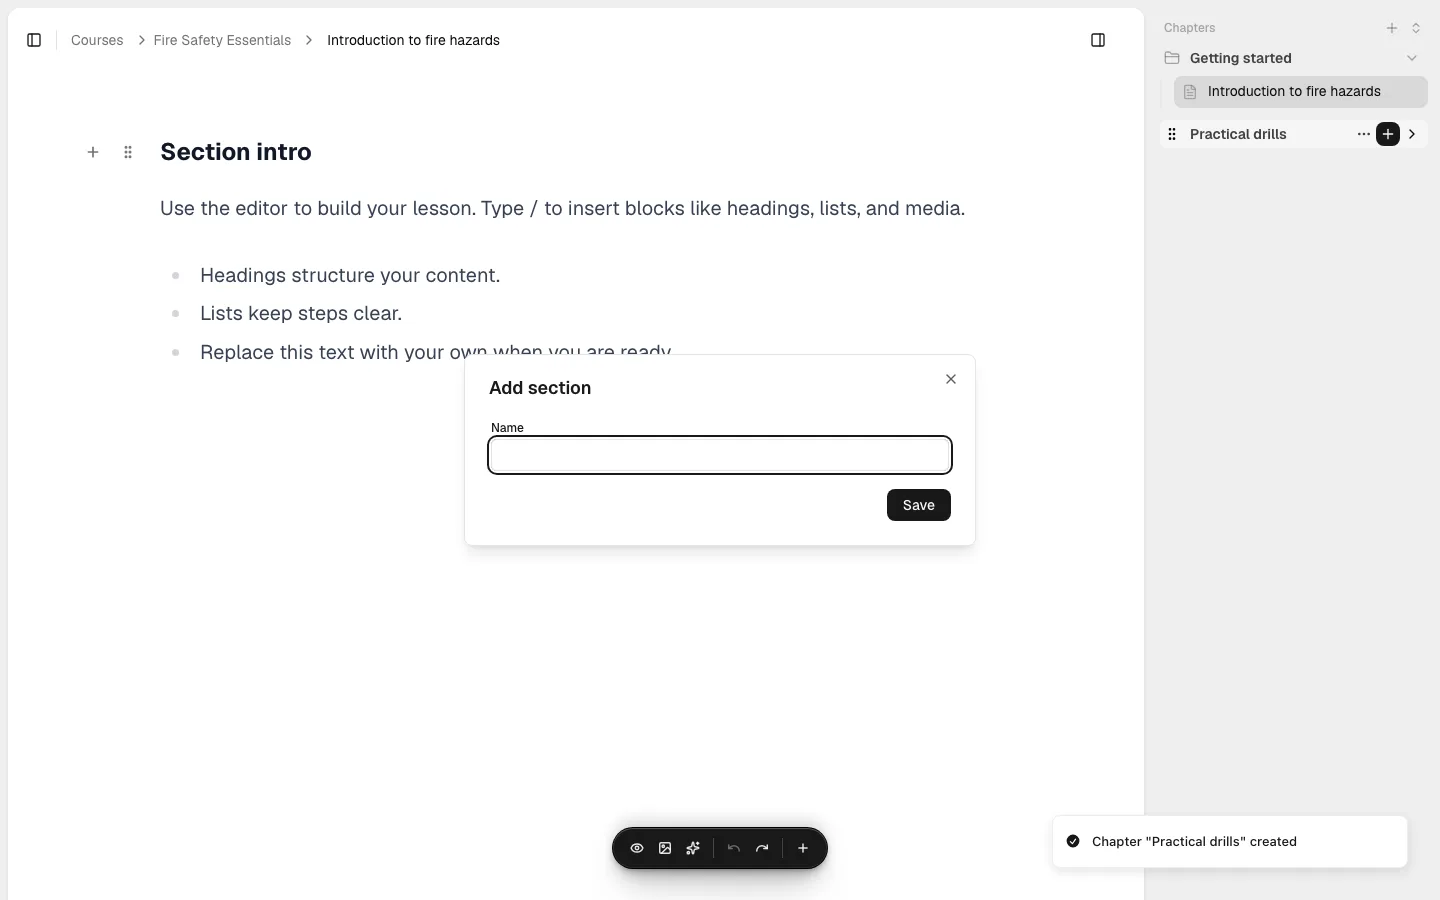
The new section is added to the end of that chapter. A new section is always added to whichever chapter's Add section control you used — use a different chapter's button to add the section there instead. You can also hover the thin line above or between existing sections to insert a new one at that exact position.
If your course isn't using chapters, the sidebar shows a single Sections list instead of Chapters, and there's one Add section button for the whole list.
Turn on chapters
Chapters group sections into named containers. This is a setting for the whole course, not per chapter — you can't mix chaptered and non-chaptered sections in the same course.
You can turn chapters on when you create your course's first section (see Create a course), or later from the course's Settings drawer. Turning chapters off again merges every section back into a single chapter and removes the others, so turn it on early if you're planning a longer course.
Add a new chapter
Once your course is using chapters, the sidebar header shows an Add chapter button.
- Click Add chapter at the top of the content tree.
- In the Add chapter dialog, enter a Name and click Save.
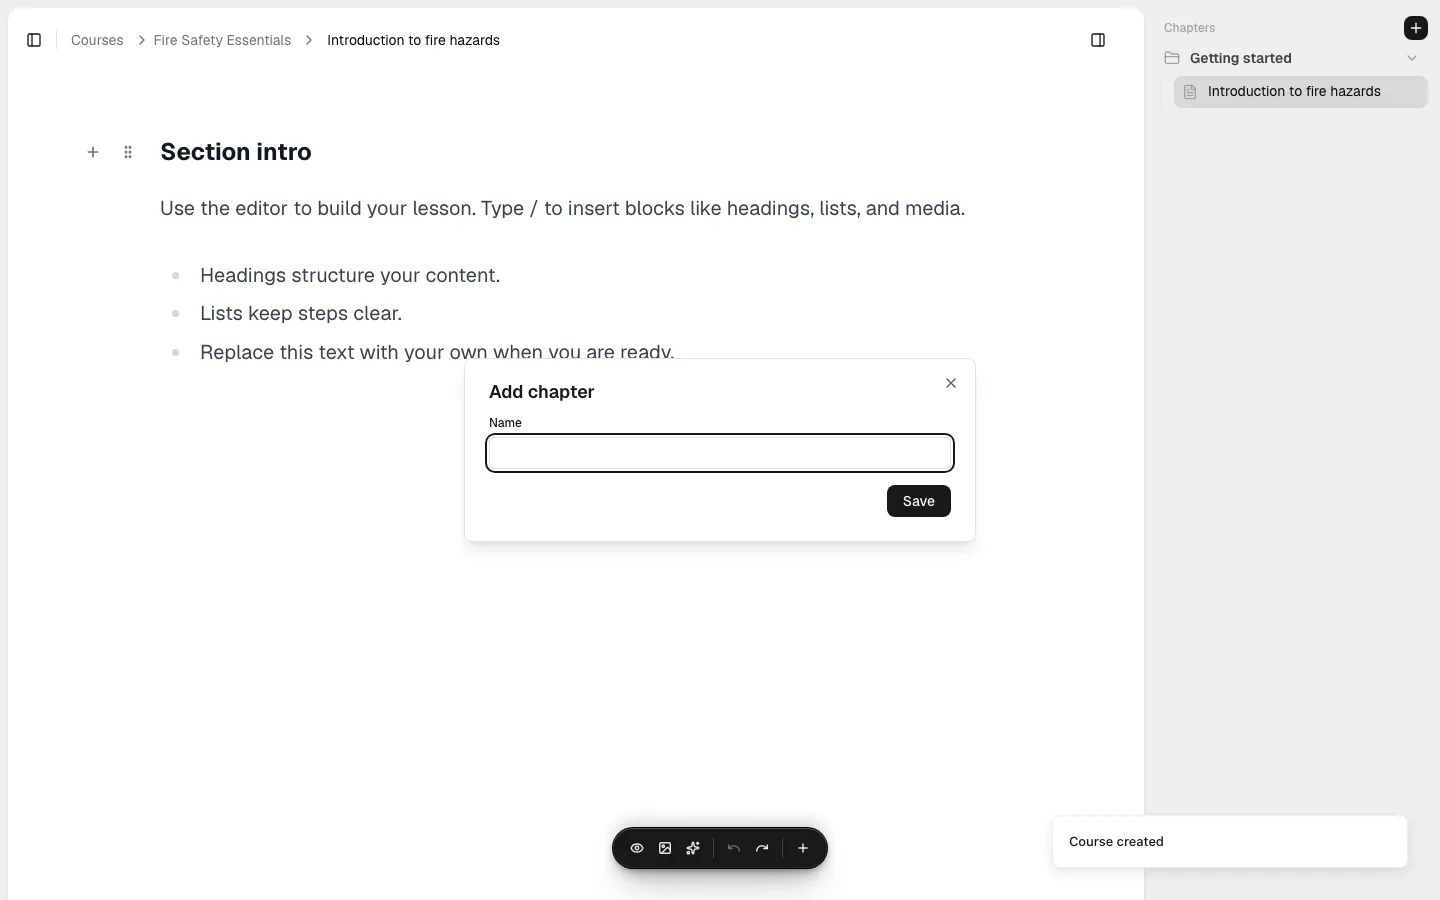
The new chapter is added to the end of the list. New chapters can appear collapsed — click a chapter's name to expand or collapse it and see its sections.
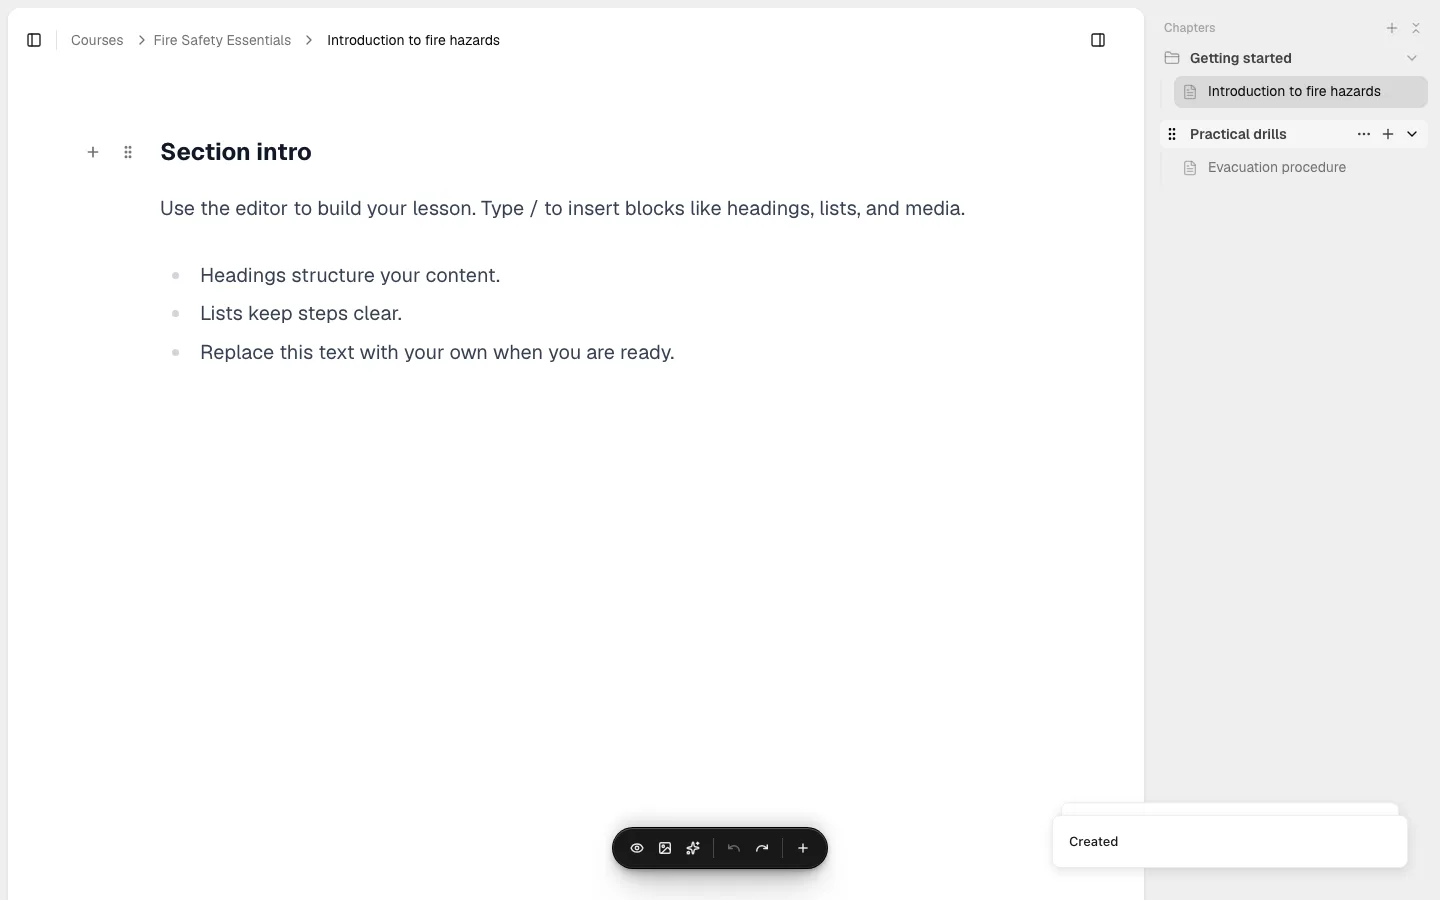
Once you have more than one chapter, an Expand all / Collapse all button also appears next to Add chapter.
Reorder sections and chapters
Hover a section or chapter row to reveal its grip handle, then drag it to reorder:
- Drag a section within its chapter, or into a different chapter.
- Drag a chapter to change where it sits relative to the other chapters.
The new order saves automatically — there's no separate save step.
Rename or delete a section or chapter
Hover a section or chapter row to reveal an ellipsis (⋯) button. Click it to reveal two icon buttons for that row: a pencil to edit, and a trash can to delete.
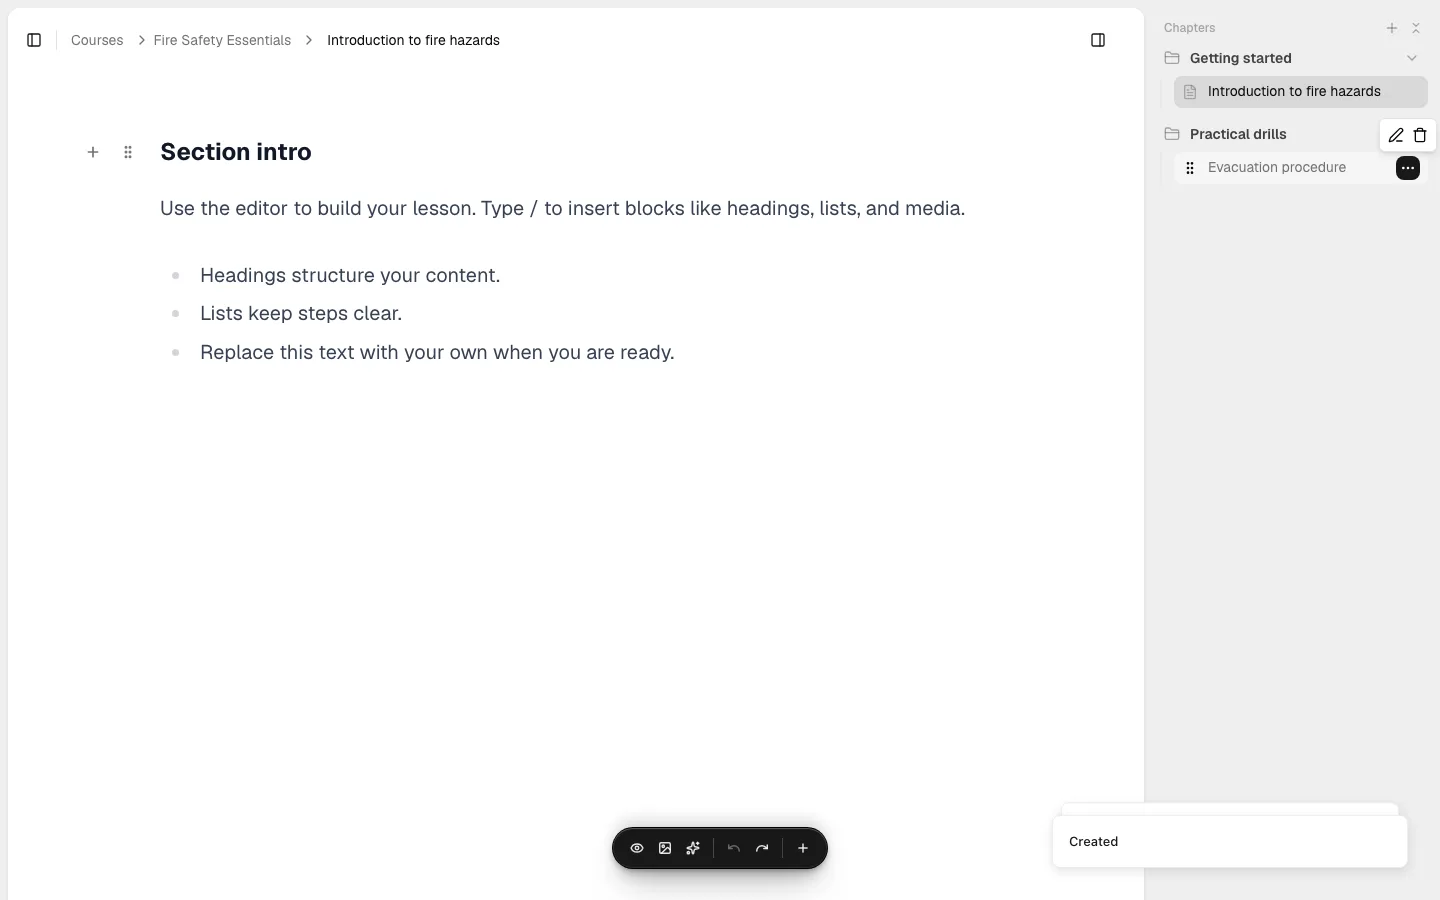
Rename — click the pencil, enter the new name, and click Save. Renaming a section regenerates its URL from the new name, so any bookmarked or shared link to that section's editor will change.
Delete a section — click the trash can, then confirm in the dialog that opens:
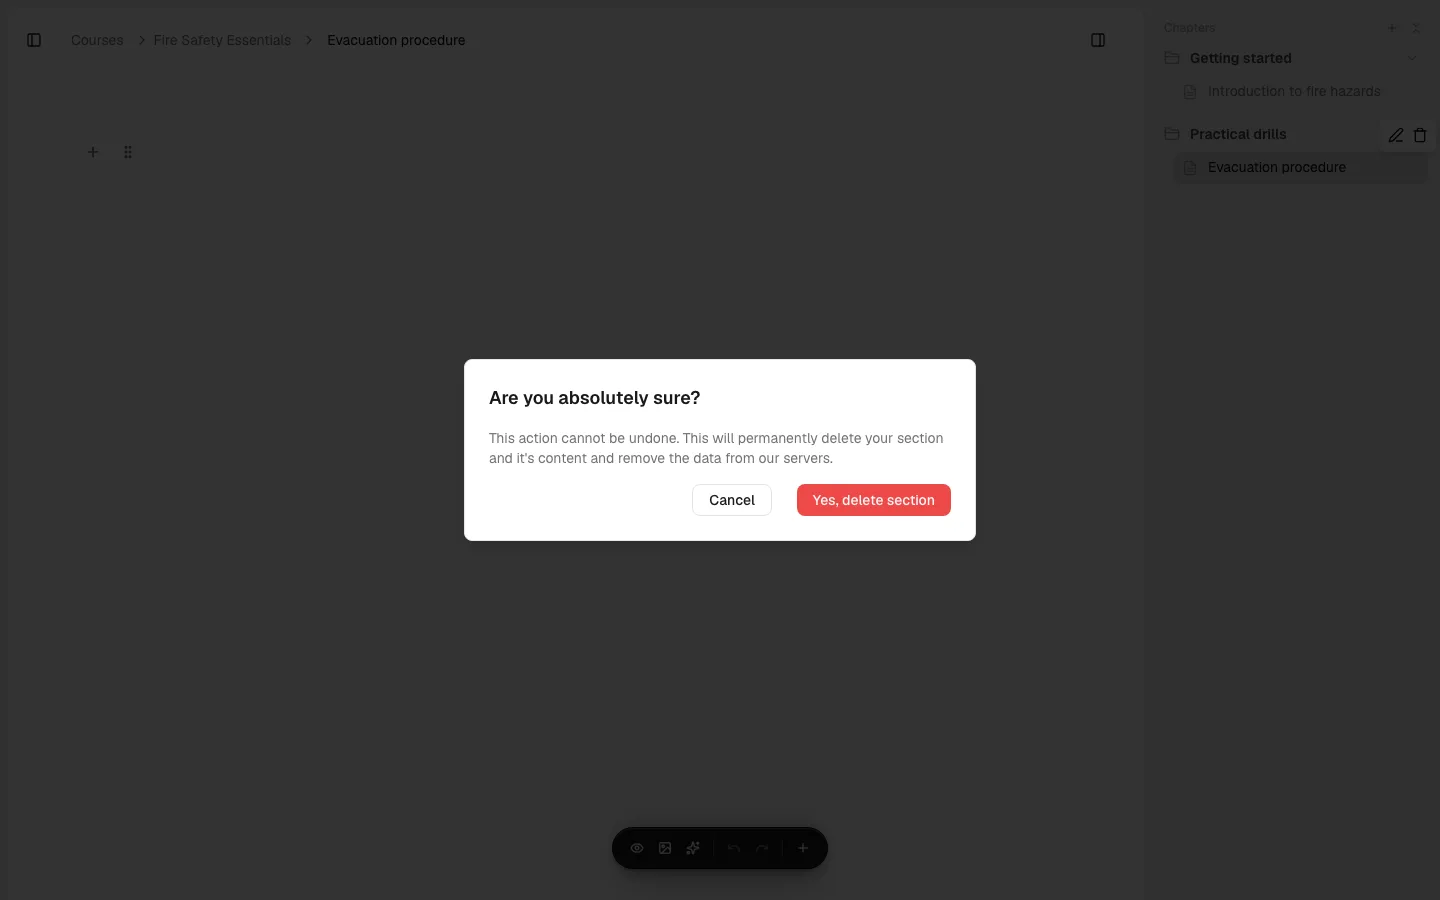
This permanently removes the section and its content. If you delete a course's only remaining section, the course returns to the empty "No sections yet" state you saw when you first created it.
Delete a chapter — click the trash can on a chapter row. If the chapter still has sections in it, the confirmation dialog lists them and its button reads Yes, delete all (N) sections — deleting the chapter removes its sections along with it in one step. An empty chapter's button reads Yes, delete chapter instead.
Nothing stops you from deleting a course's only remaining chapter. If you do, the chapter and any sections still inside it are removed immediately — but the app then shows a "Failed to delete chapter" error regardless, which can make it look like the delete didn't go through when it actually did. Double-check you're not deleting your last chapter before confirming.
Next steps
- Add lessons, quizzes, and media inside a section — see the section content editor.
- Review the Using chapters toggle and other course-wide options in Edit course settings.
- See the FAQ for answers to common questions.
Frequently asked questions
Add a test to a section
Insert Multiple Choice, Multiple Response, and Fill In questions into a section, set correct answers, and preview them as a participant would see them.
Find your way around the course dashboard
Get oriented on a course's dashboard — its key metrics, and where to go next to build, publish, and manage the course.