Find your way around the course dashboard
Get oriented on a course's dashboard — its key metrics, and where to go next to build, publish, and manage the course.
Every course has a dashboard — the page you land on when you open the course. It's the orientation hub for everything else you can do with a course: build content, check on participants, publish, and manage settings.
Open a course's dashboard
- In your organization, go to All courses.
- Click a course to open it.
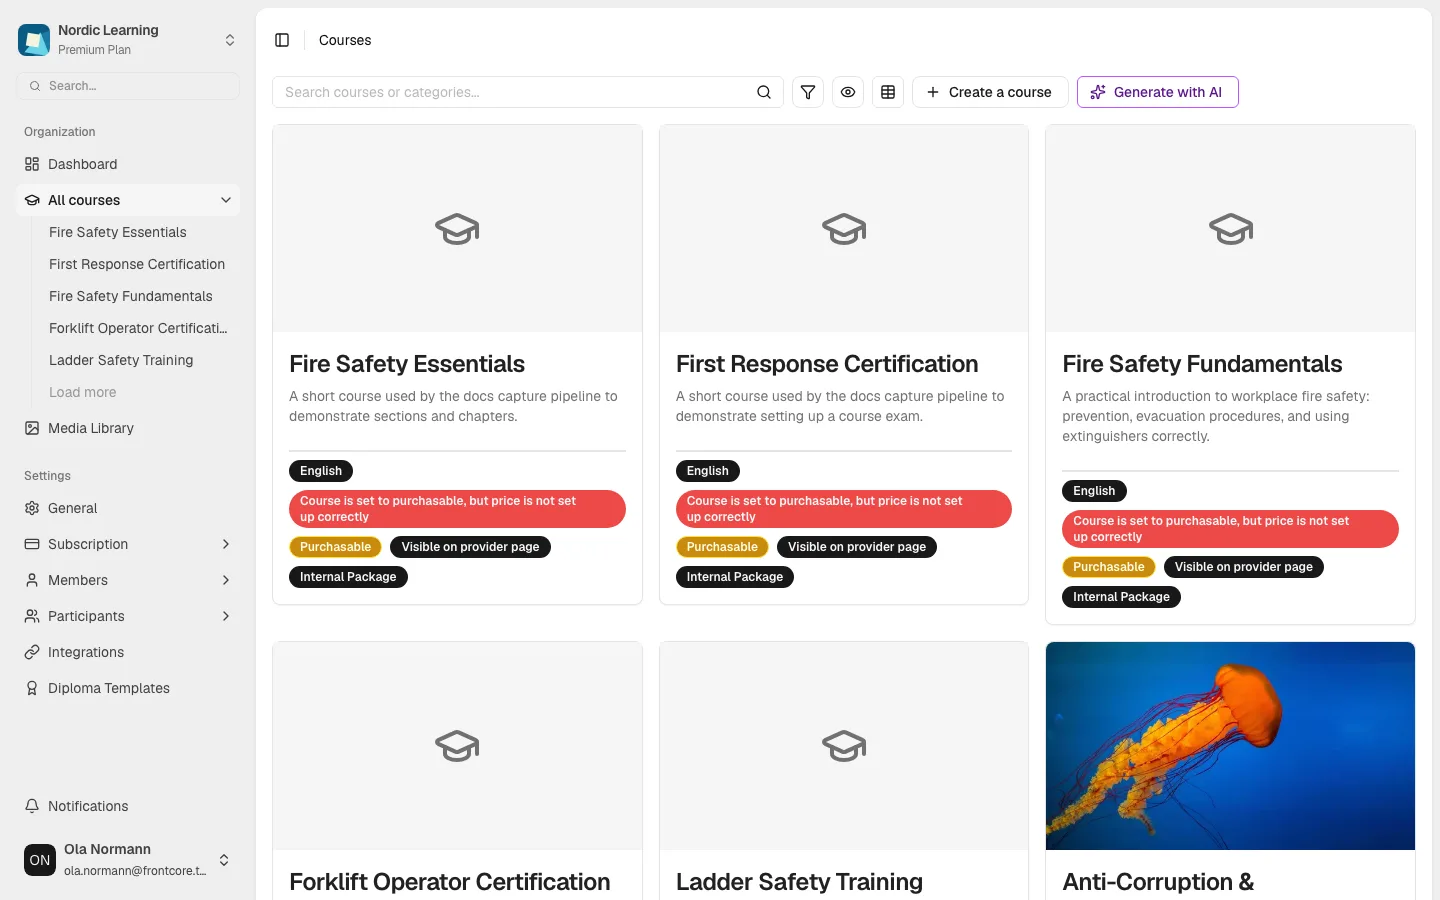
You land on the same dashboard whether you click in from the list or navigate straight to it by URL — both render the same page.
Don't have a course yet? See Create a course first.
If the course has no sections yet, the dashboard is replaced by a No sections yet prompt with a New section button instead of the metrics described below. See Build sections and chapters to get started.
What's on the dashboard
The page heading reads Course Dashboard, followed by a row of metric cards:
- Total Participants
- Participants last month
- Sections
- Test Questions
- Total Feedbacks
- Average Completion Rate
- Exam enabled — Yes or No
- Finished participants
- Passing percentage — only shown once the course's exam is enabled
Each card has an info icon with a short explanation of what it counts.
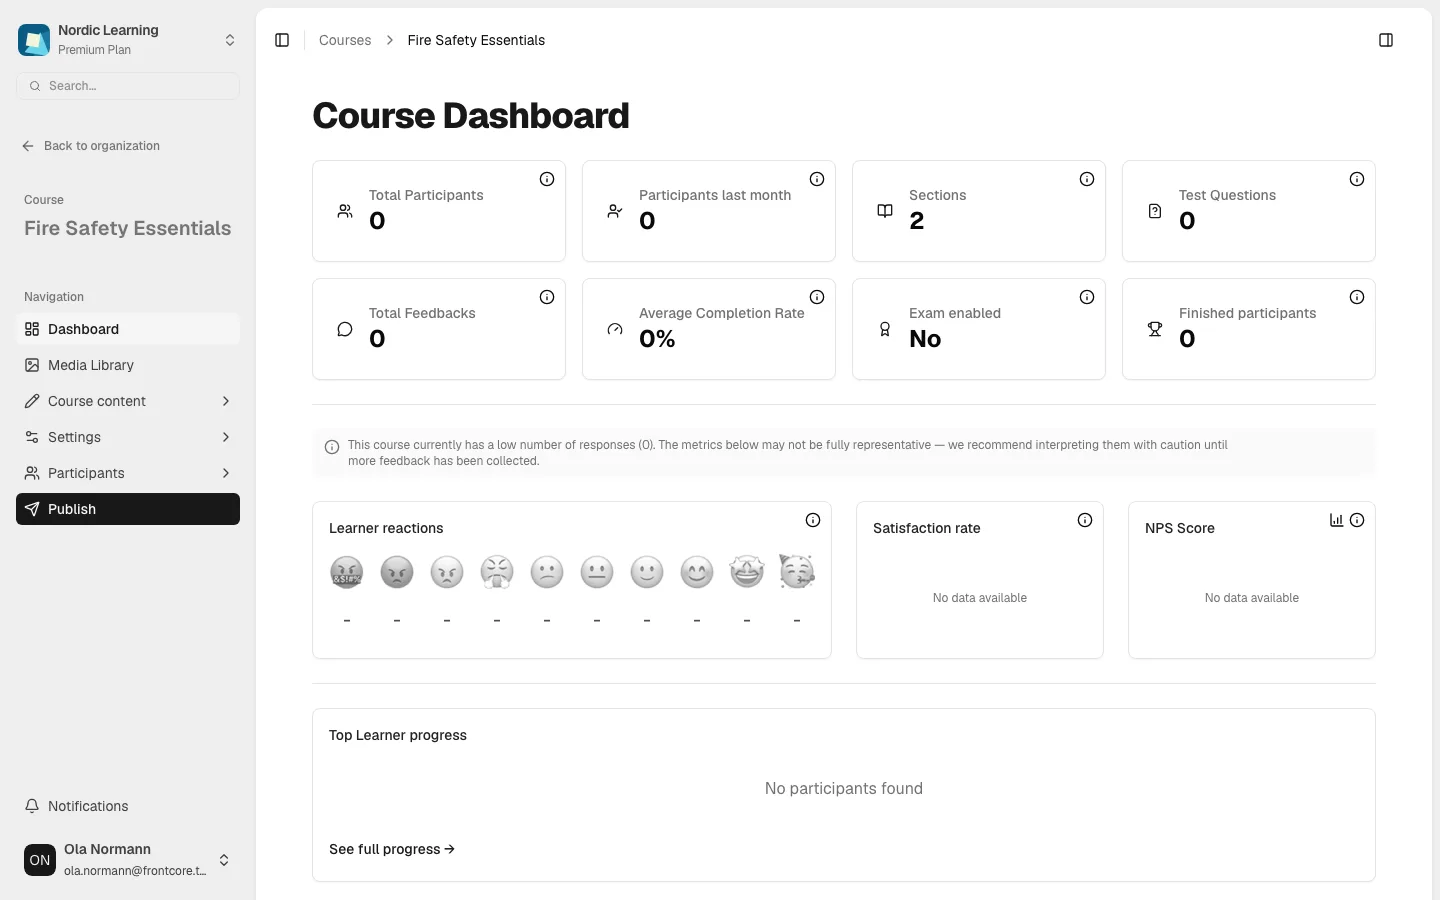
Below the metric cards:
- Participant charts — a participants-over-time chart and a cumulative-participants chart. These only appear once the course has more than one month of enrollment history; a brand-new or lightly-used course won't show them yet.
- A low feedback notice whenever the course has fewer than 15 feedback responses — including zero — warning that the numbers below may not be fully representative yet.
- Feedback cards: Learner reactions, Satisfaction rate, and NPS Score.
- A Tag Distribution card, once feedback has been tagged.
- An Upcoming recertifications widget at the top of the page, but only if recertification is enabled for the course. See Course recertification.
- A Top Learner progress card listing your top-performing participants, with a See full progress → link through to the full Participants table.
Panels without data yet — the participant charts, the Tag Distribution card, the recertification widget — simply don't render rather than showing an empty chart. Don't worry if you see fewer panels than described here on a new course.
Find your way around from the sidebar
The course sidebar (visible on every course page, including the dashboard) is where you go next. Exactly how the items are grouped depends on your window size, but the same destinations are always reachable:
- Back to organization — returns to the org's Courses list.
- Dashboard — this page.
- Media Library — opens the file library drawer.
- Course content — the chapter/section tree, plus Exam (Edit / Settings) and Attachments.
- Settings — opens the Course settings drawer (see below).
- Participants — Registered / Invited / Access requests (plus Recertification if enabled).
- Instructors — Registered / Invited.
- Pricing.
- Publish — reads Publish before the course is published, Publishing afterward, with a badge showing how many sections have unpublished changes.
If the course was imported from a SCORM or cmi5 package, the sidebar marks it as an external course and section editing is disabled — the chapter/section tree is replaced by a notice that authoring isn't available. See Import a SCORM or cmi5 course.
Course settings open as a drawer, not a page
Opening Settings from the sidebar doesn't navigate to a new page — it slides in a Course settings drawer over the current page, titled Course settings with the description Configure your course settings and options.
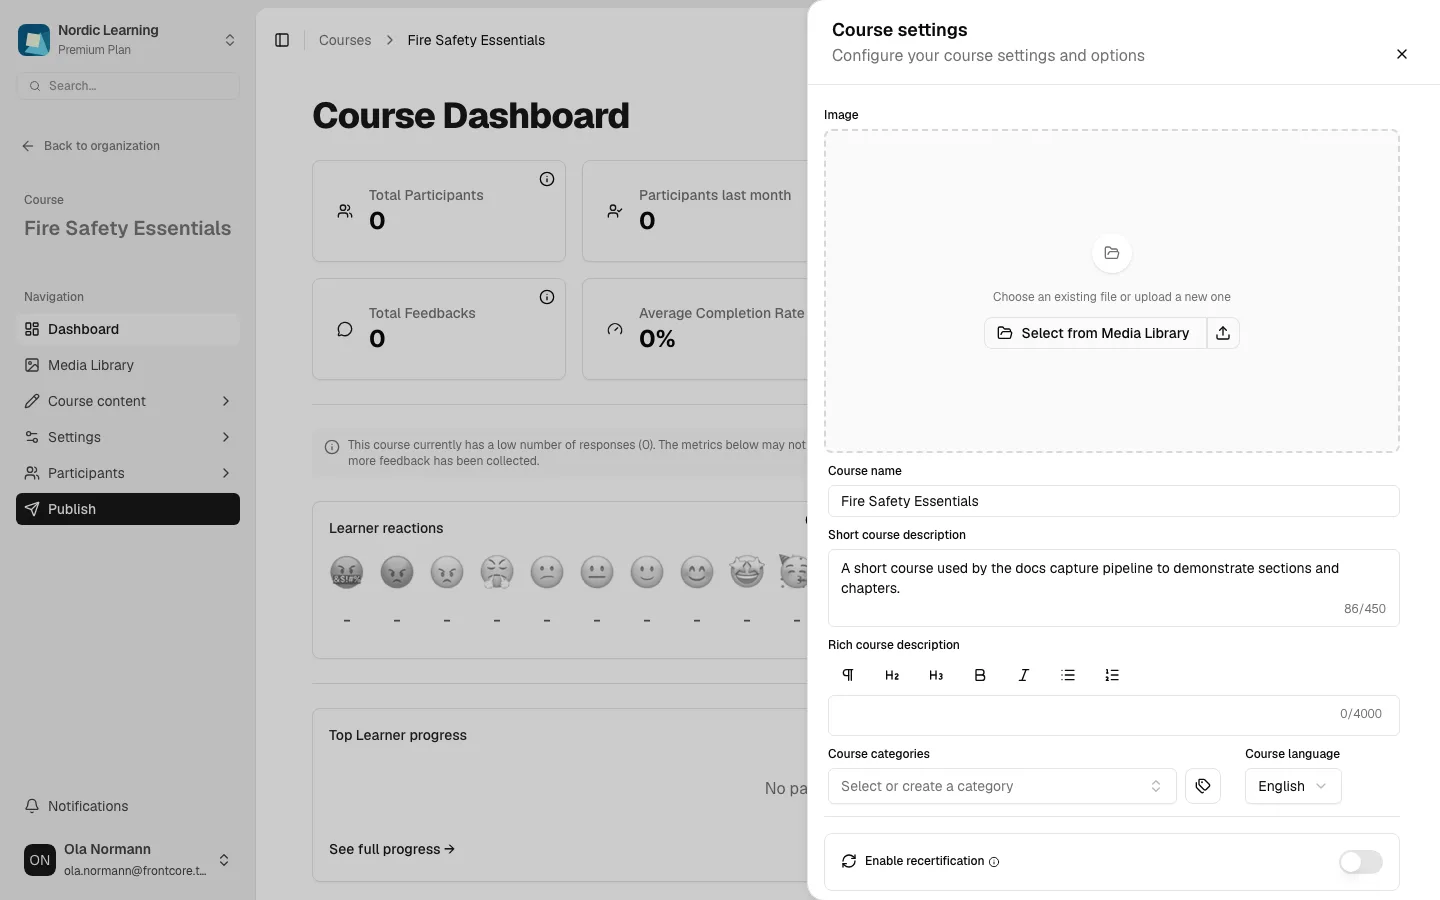
You can also open it directly by adding ?settings=course to any course URL — useful for linking straight to settings from elsewhere. The drawer covers the course's name, descriptions, categories, language, cover image, recertification, time limits, default invitation options, diploma template, and the chapters/visibility/unlocked-lessons/AI-assistant toggles, plus Duplicate and Delete at the bottom. See Edit course settings for the full walkthrough.
Exam settings work the same way — they open as their own drawer from the sidebar's Exam section, not a separate page.
Publish before you can invite participants
Clicking Participants in the sidebar takes you to the course's participant list. Until the course is published, that whole area is locked: it renders blurred, with an alert reading Cant invite participants — Course has to be published to invite participants — and a Publish course button.
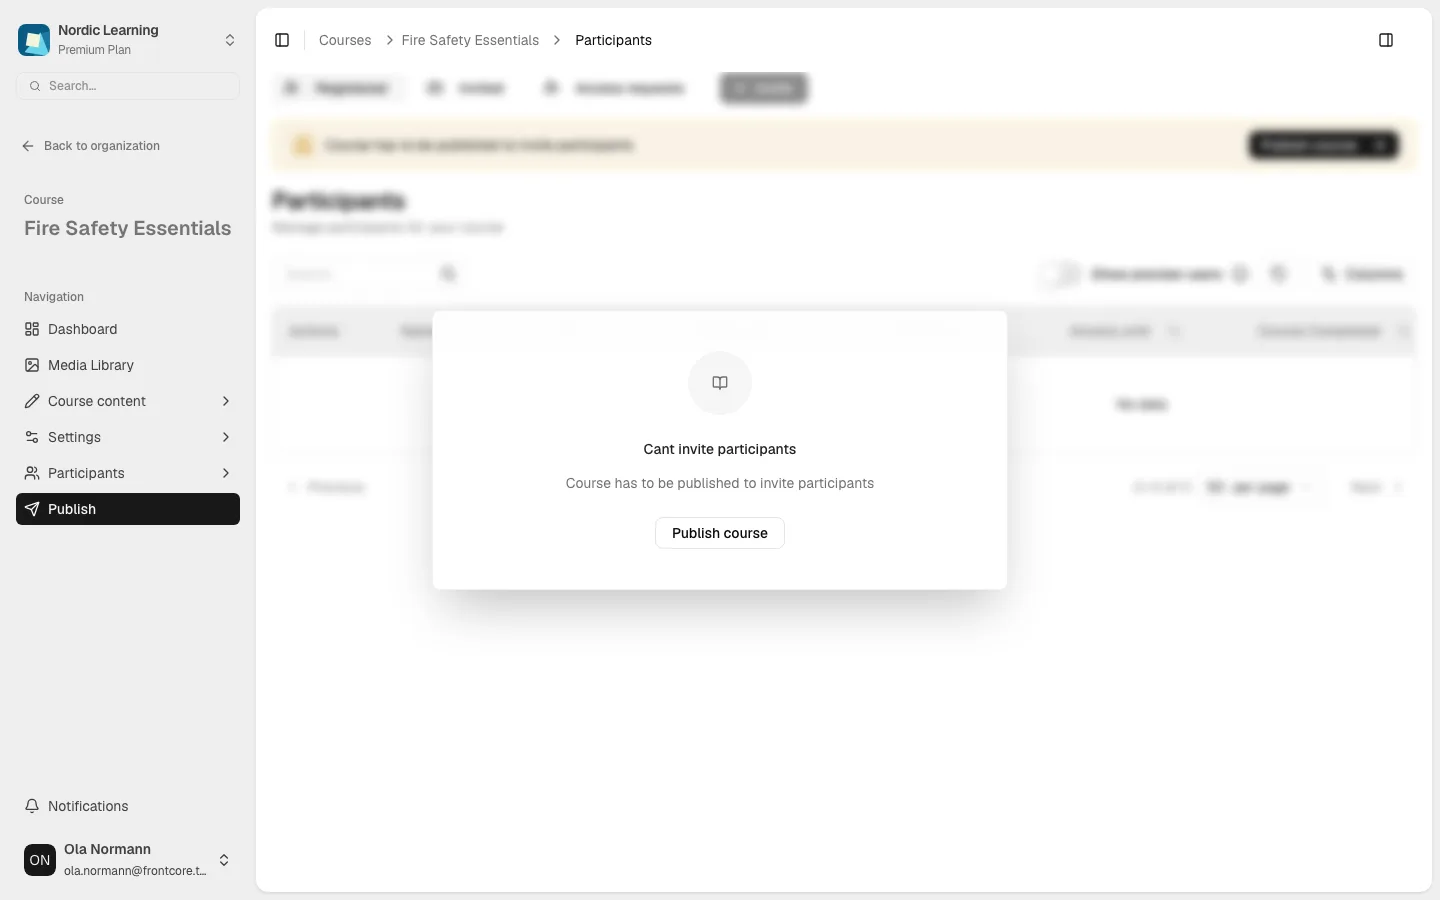
Once the course is published, this area unlocks and you can invite participants. See Publish a course and Invite and manage participants.
Next steps
- Build sections and chapters
- Use the section content editor
- Edit course settings
- Publish a course
- Invite and manage participants
- Manage course attachments
FAQ
Build a course with sections and chapters
Add, rename, reorder, and delete the sections and chapters that make up your course content, and turn chapters on for longer courses.
Set up a course exam
Build exam questions, configure attempts and passing thresholds, and activate a course's exam for participants.