Set up a course exam
Build exam questions, configure attempts and passing thresholds, and activate a course's exam for participants.
A course can have one exam, built separately from its regular sections on its own kanban board of exam sections and questions.
Open the Exam tab
- In your course sidebar, click Exam.
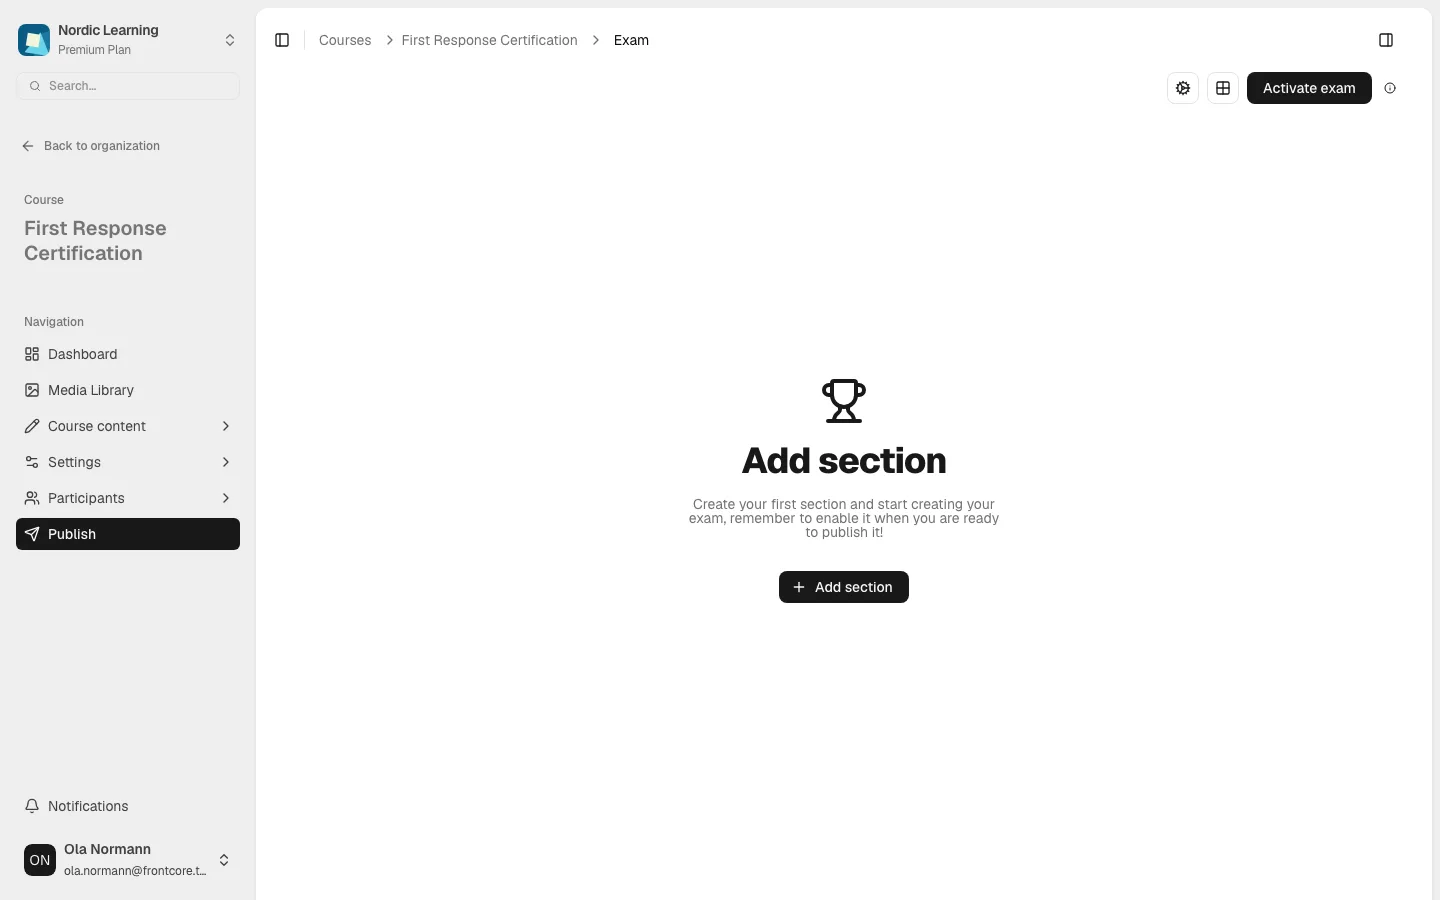
Most courses already have an exam waiting the moment they're created — it just starts disabled with no sections yet, so you land straight on the builder:
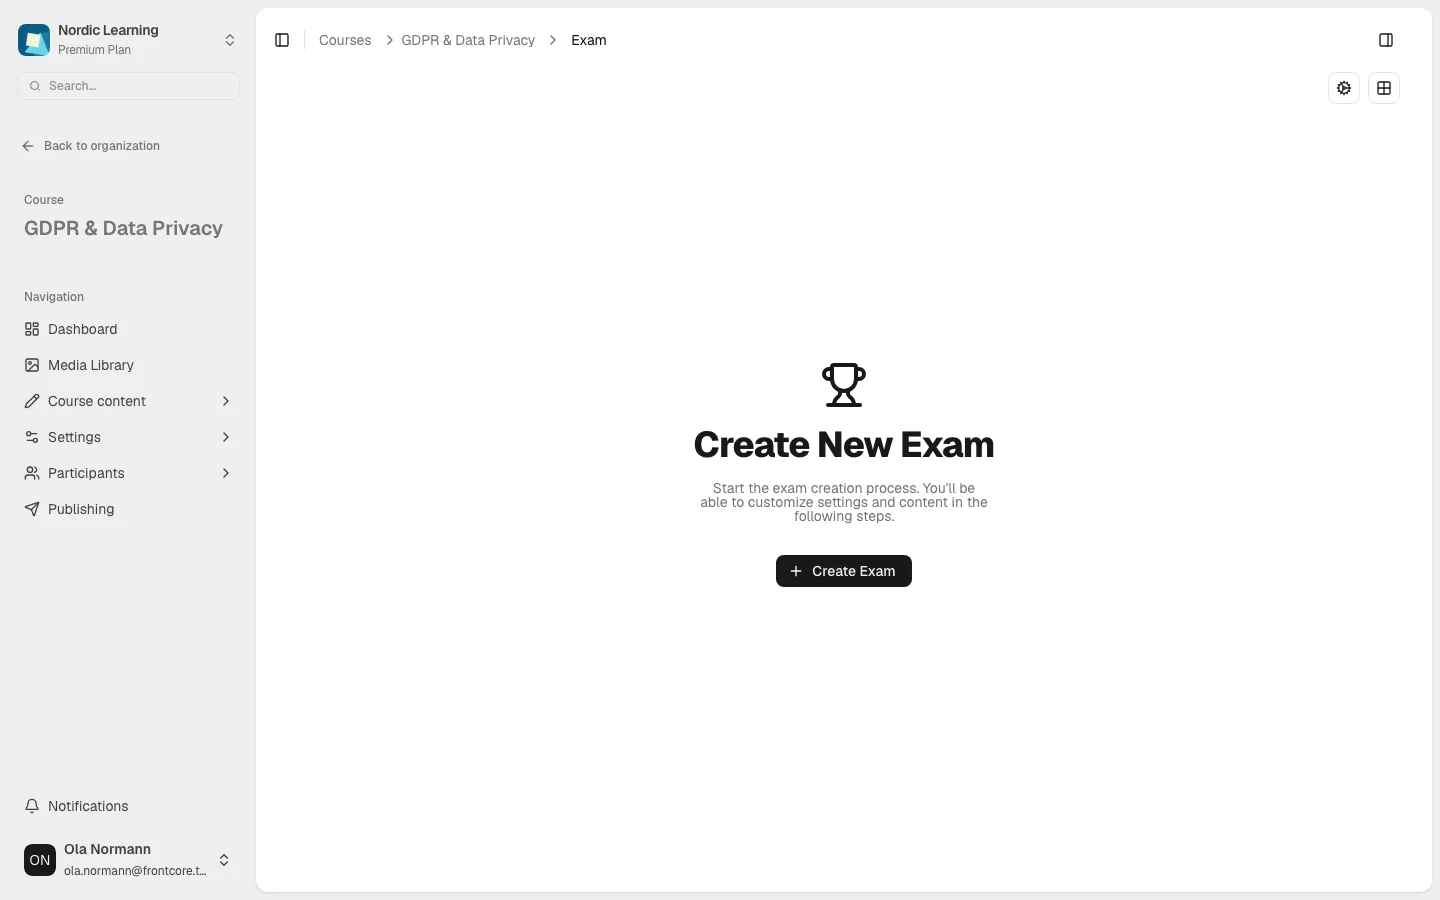
If you land on a Create New Exam screen instead — with a Create Exam button — the course genuinely has no exam yet. This happens for courses that predate having one, or that were set up outside the normal course-creation flow. Click Create Exam to set one up, then continue below.
Build exam questions
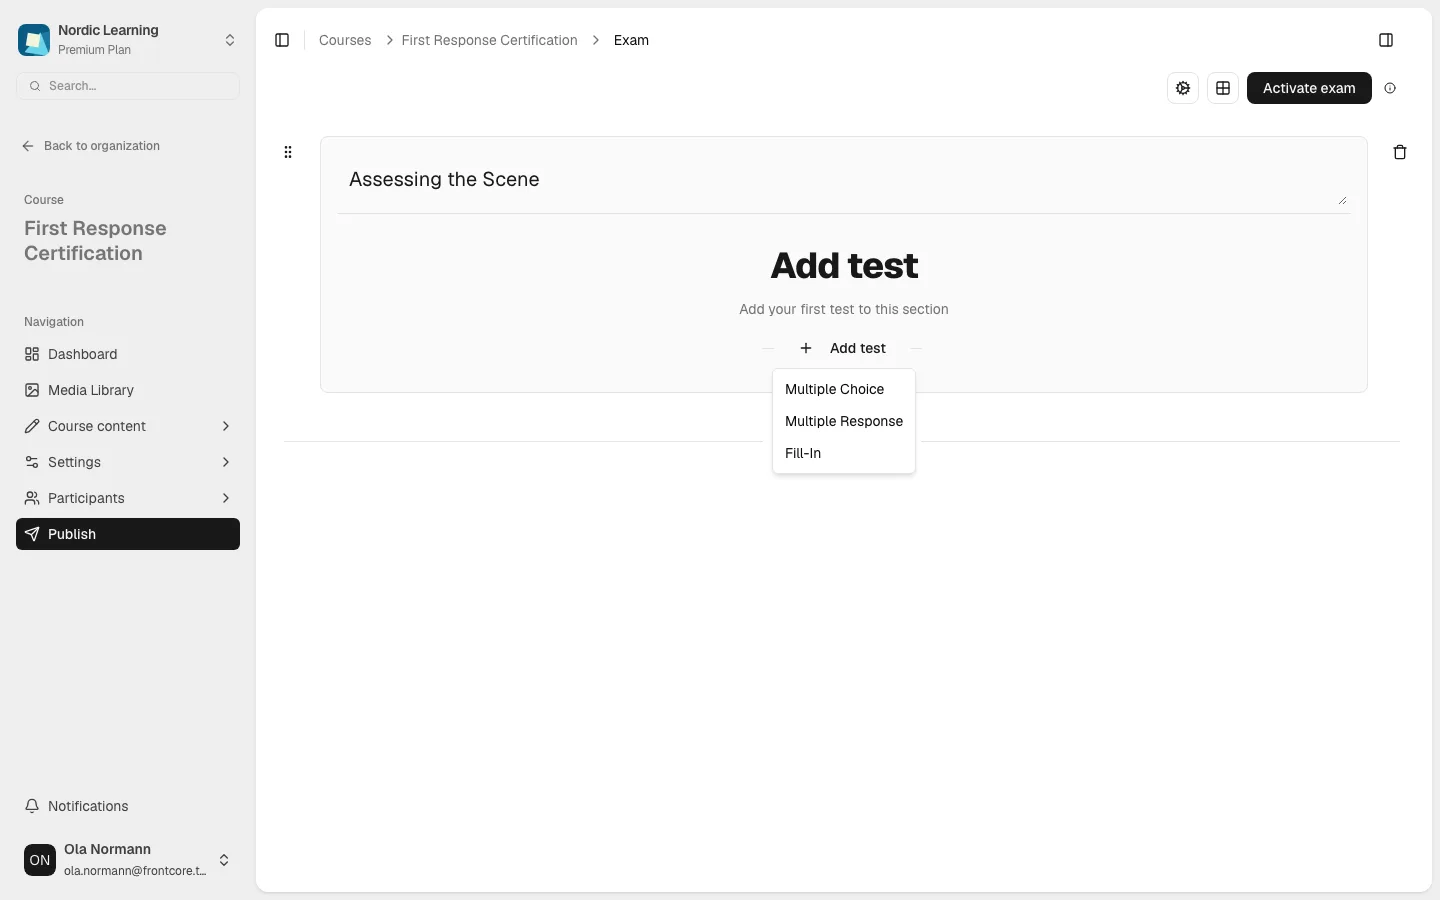
- Click Add section and give it a name (for example, "Assessing the Scene"). Exam sections are separate from your course's regular sections — they only organize exam questions.
- In the new section, click Add test and choose a question type: Multiple Choice, Multiple Response, or Fill-In.
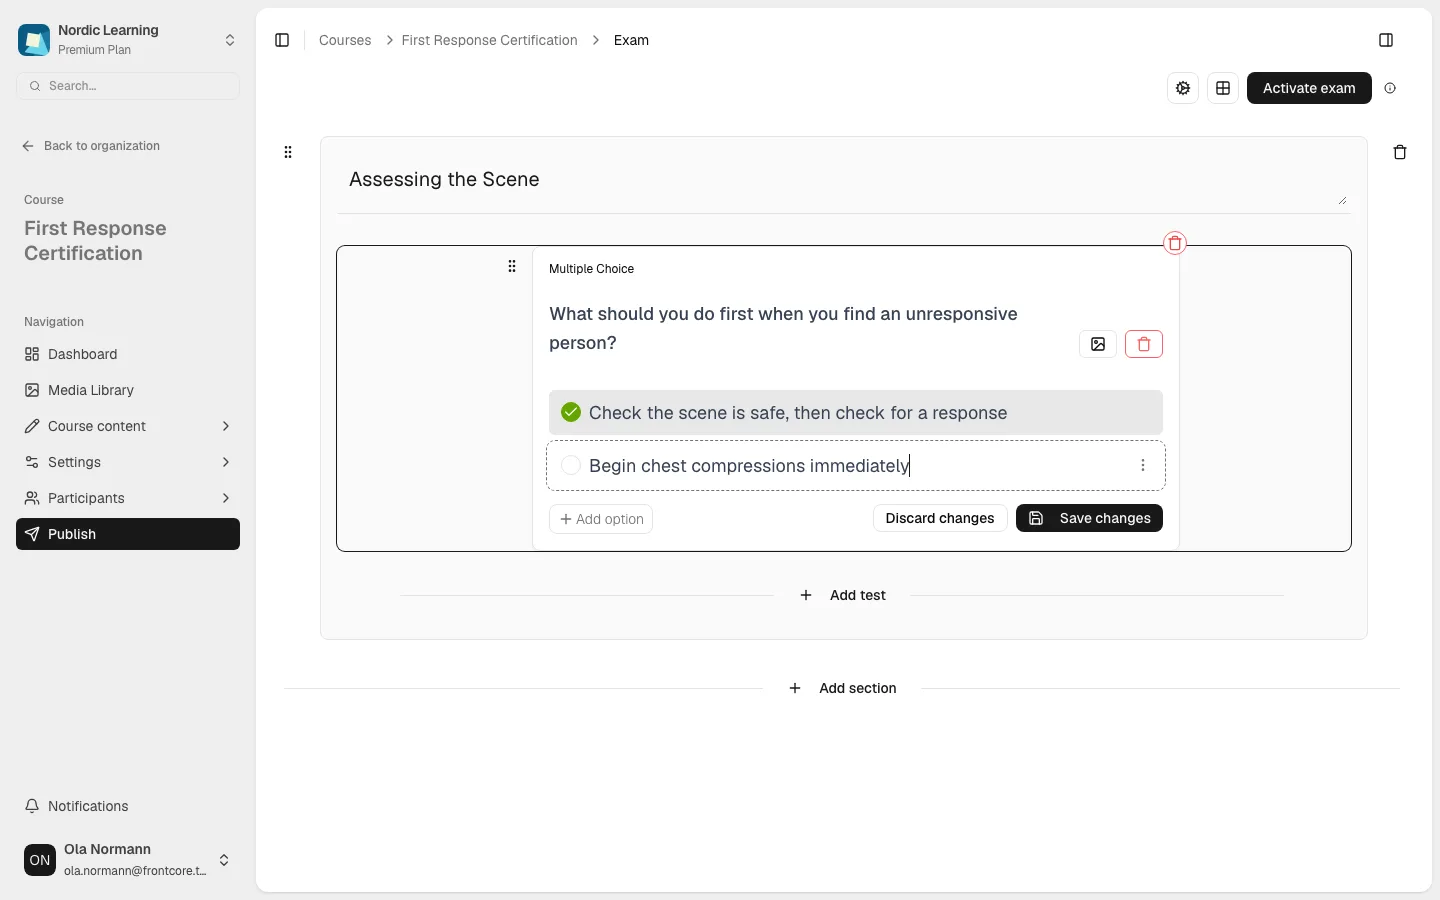
- Fill in the question and its options, then click Save changes. A new Multiple Choice question starts with two empty options, the first already marked correct — click the circle next to an option to mark it correct instead, or Add option for more.
Multiple Choice, Multiple Response, and Fill-In questions here work exactly like the quizzes you add inside a course section — see Add tests to a section for the full editor details (option limits, validation messages, and so on). The only difference is the container: exam questions live in exam sections, not course sections.
Repeat with Add section and Add test to build out the rest of the exam. Drag a section or question by its grip handle to reorder it.
Configure exam settings
Click the cog icon at the top of the exam builder to open the Exam settings drawer.
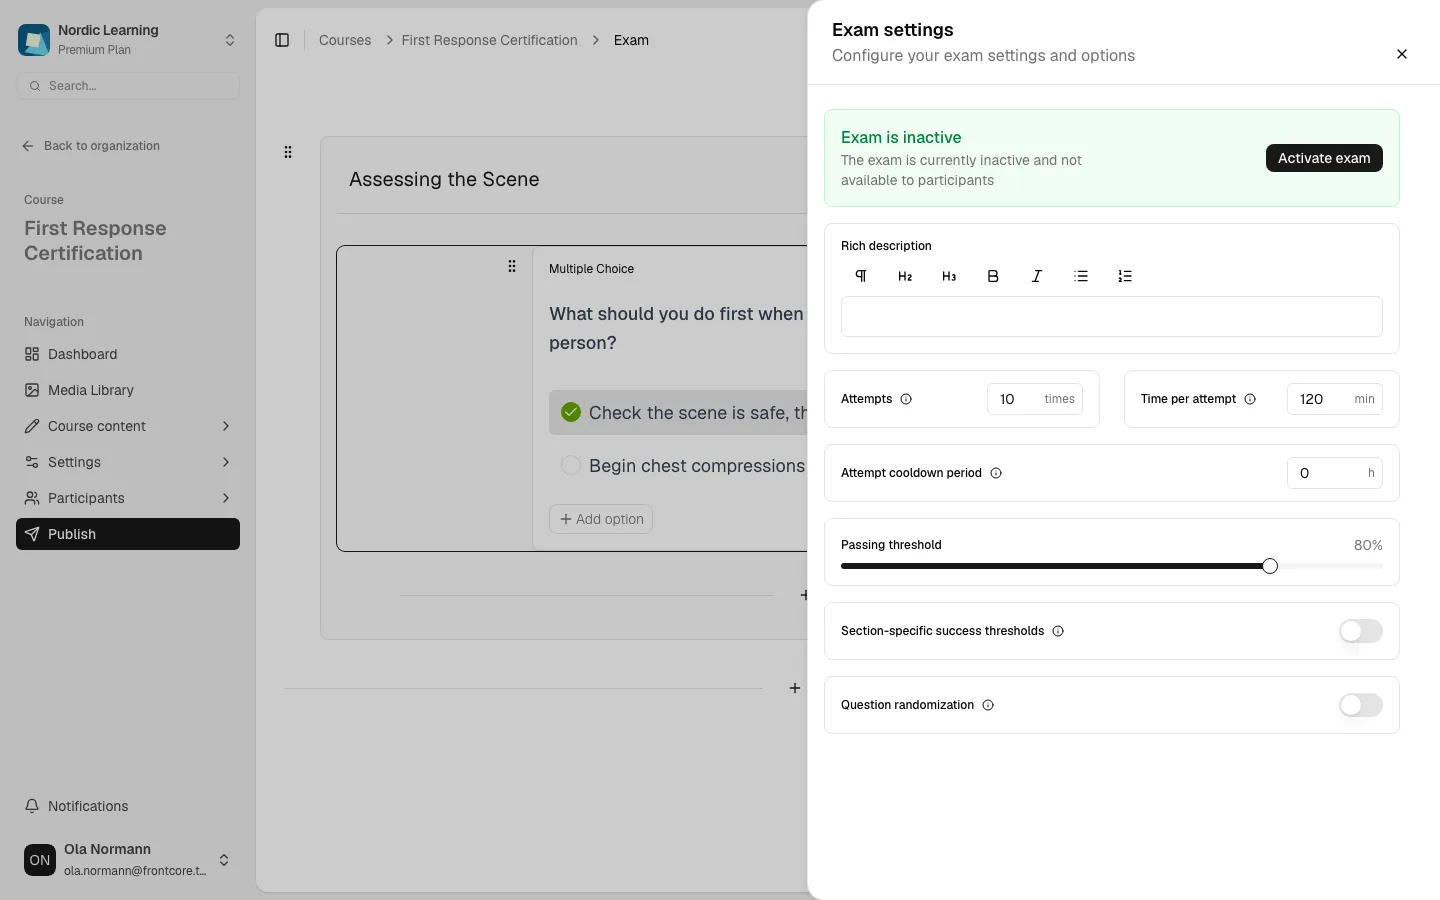
The drawer holds:
- A status banner — Exam is active or Exam is inactive — with an Activate exam / Deactivate exam button.
- Rich description, shown to participants before they start.
- Attempts — how many times a participant may attempt the exam.
- Time per attempt — the time limit for a single attempt, in minutes.
- Attempt cooldown period — hours a participant must wait after a failed attempt before trying again.
- Passing threshold — the overall percentage required to pass, as a slider.
- Section-specific success thresholds — off by default; switch it on to also require a minimum score in each exam section individually, shown in a per-section table.
- Question randomization — off by default; switch it on to show only a random subset of each section's questions per attempt, with a Questions to show count per section.
A new exam starts at 10 attempts, 120 minutes per attempt, no cooldown, and an 80% passing threshold — visible in the screenshot above.
If the course itself has a time limit (set in course settings), the drawer shows an info alert reminding you the exam counts against it, plus a warning if Time per attempt is longer than the course's overall time limit.
Reset and Save appear in the drawer footer only once you've changed something.
Activate the exam
A new exam starts inactive — the empty-state description says as much: "remember to enable it when you are ready to publish it!". Participants can't take an inactive exam. Turn it on either:
- From the status banner inside Exam settings, with Activate exam, or
- From the Activate exam button in the exam builder's header, shown whenever the exam is currently inactive.
Building questions and configuring settings works the same whether the exam is active or not — but nothing is visible to participants until you activate it.
To see what an activated exam actually looks like from a participant's side, see Take a course exam.
Next steps
- Add tests to a section covers the same three question types in a course section.
- Edit course settings for the course-wide time limit that interacts with the exam's per-attempt time.
- Issue and view diplomas — passing an exam is one of the events that can trigger a diploma.
FAQ
Find your way around the course dashboard
Get oriented on a course's dashboard — its key metrics, and where to go next to build, publish, and manage the course.
Edit course name, description, cover, and visibility
Update a course's name, descriptions, language, cover image, and provider-page visibility from the course settings drawer.