Invite and manage organization members
Invite people to your organization, change their role, and remove members you no longer need.
An organization member is a person with an account in your organization — an Admin or an Editor. Members are different from participants: a participant is someone enrolled in one of your courses. Members don't automatically become participants, and participants don't automatically become members. See Manage participants across courses.
Admin and Editor roles
Every member has one of two roles:
| Role | What they can do |
|---|---|
| Admin | Manage members, courses, and organization settings. |
| Editor | Create and edit courses only. |
If you're an Editor, you can view the Members pages but you can't invite, edit, or remove members. The Invite user button is disabled, and you'll see an Invalid Permissions alert reading "You have to be an admin to edit and add members".
Open the Members page
- In the sidebar, under Settings, click Members. This opens the Registered tab at Organization Members.
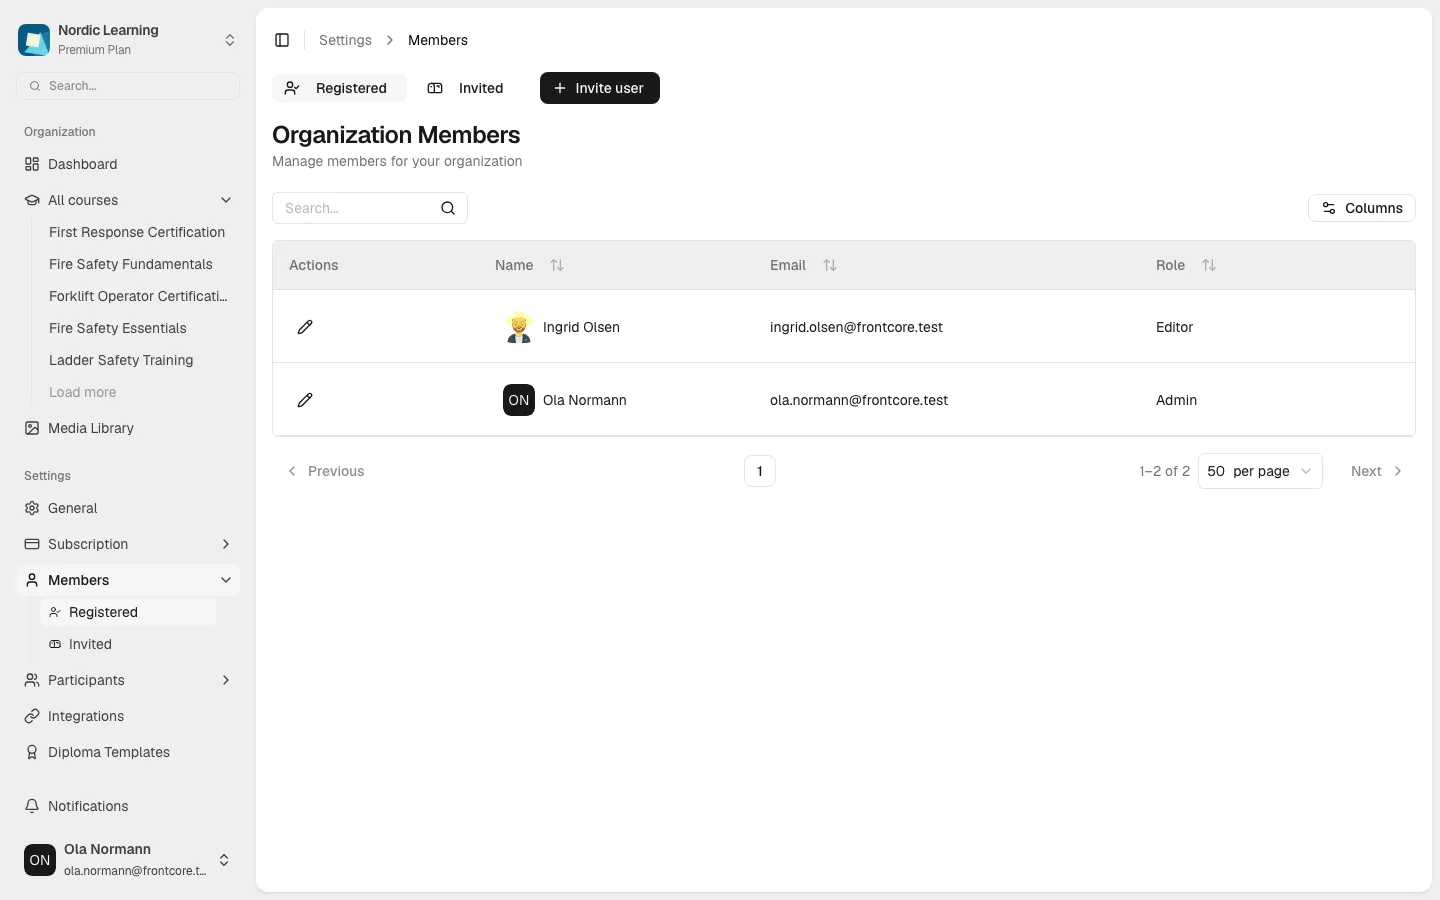
Each row shows a member's Name, Email, and Role, plus a pencil icon under Actions for editing them. A sub-nav at the top switches between Registered (current members) and Invited (pending invitations).
Invite a new member
- On the Registered tab, click Invite user.
- In the dialog, enter the person's Email.
- Choose a Role — Editor or Admin (Editor is selected by default).
- Click Invite.
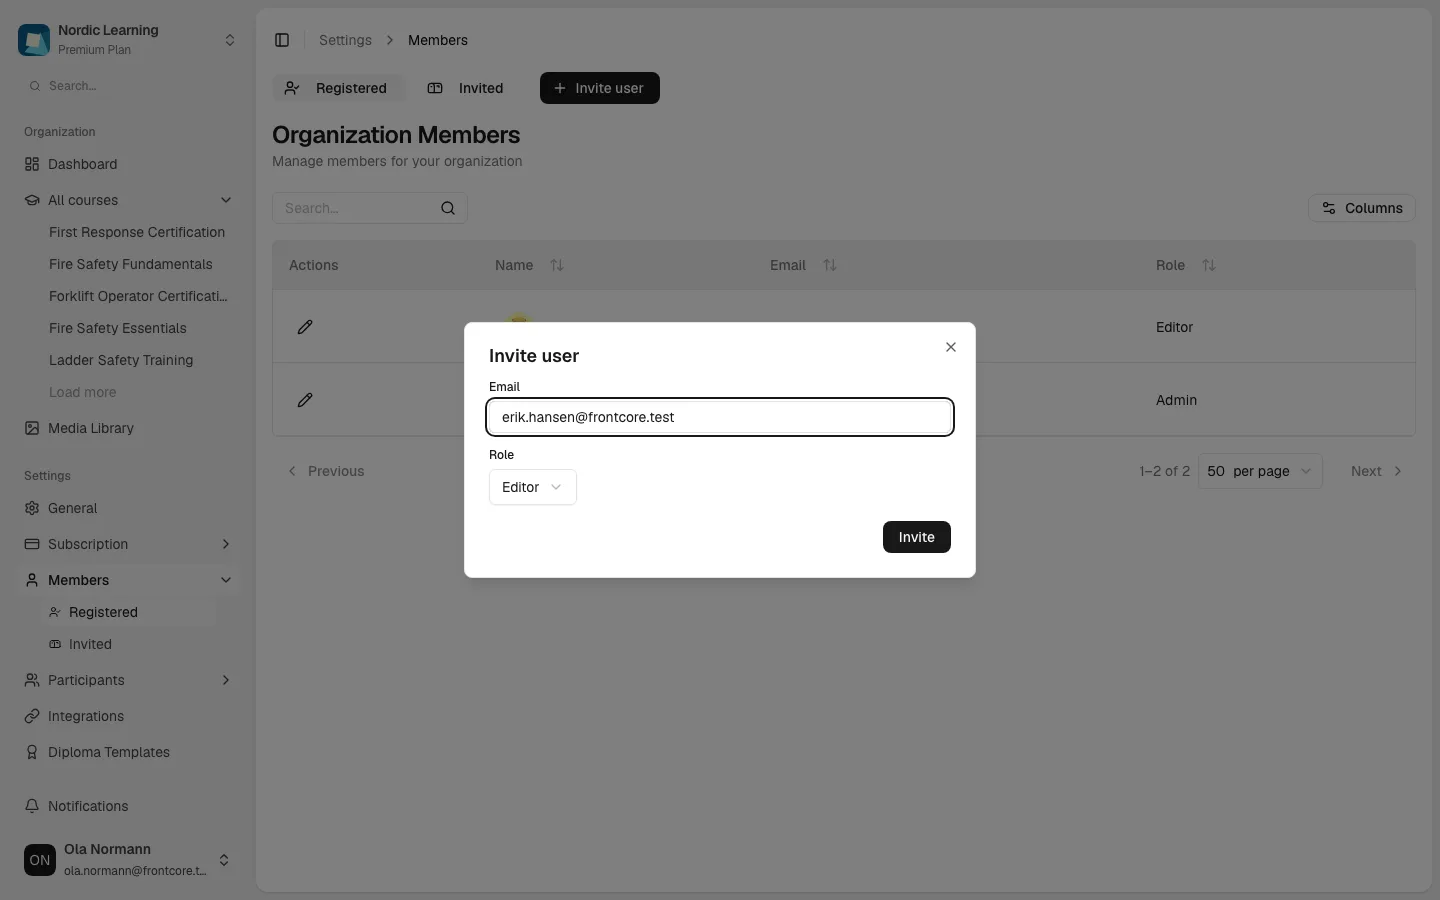
The invitee gets an email with a sign-in link — the same kind of link used for magic-link sign-in. Following it signs them in and adds them to your organization. The invitation stays on the Invited tab until it's accepted or cancelled — you can resend the email as many times as needed in the meantime.
Clicking Invite user runs the same participant-limit check used when inviting course participants — if your organization is close to or at its limit, a warning dialog appears first. See Organization participant limits for what each warning looks like and your options at that point.
Inviting someone who's already a member, or who already has a pending invitation, still shows the normal confirmation. Check the Registered and Invited tabs to see whether they're already there before inviting them again.
View and manage pending invitations
- Click the Invited tab (or Settings → Members → Invited in the sidebar).
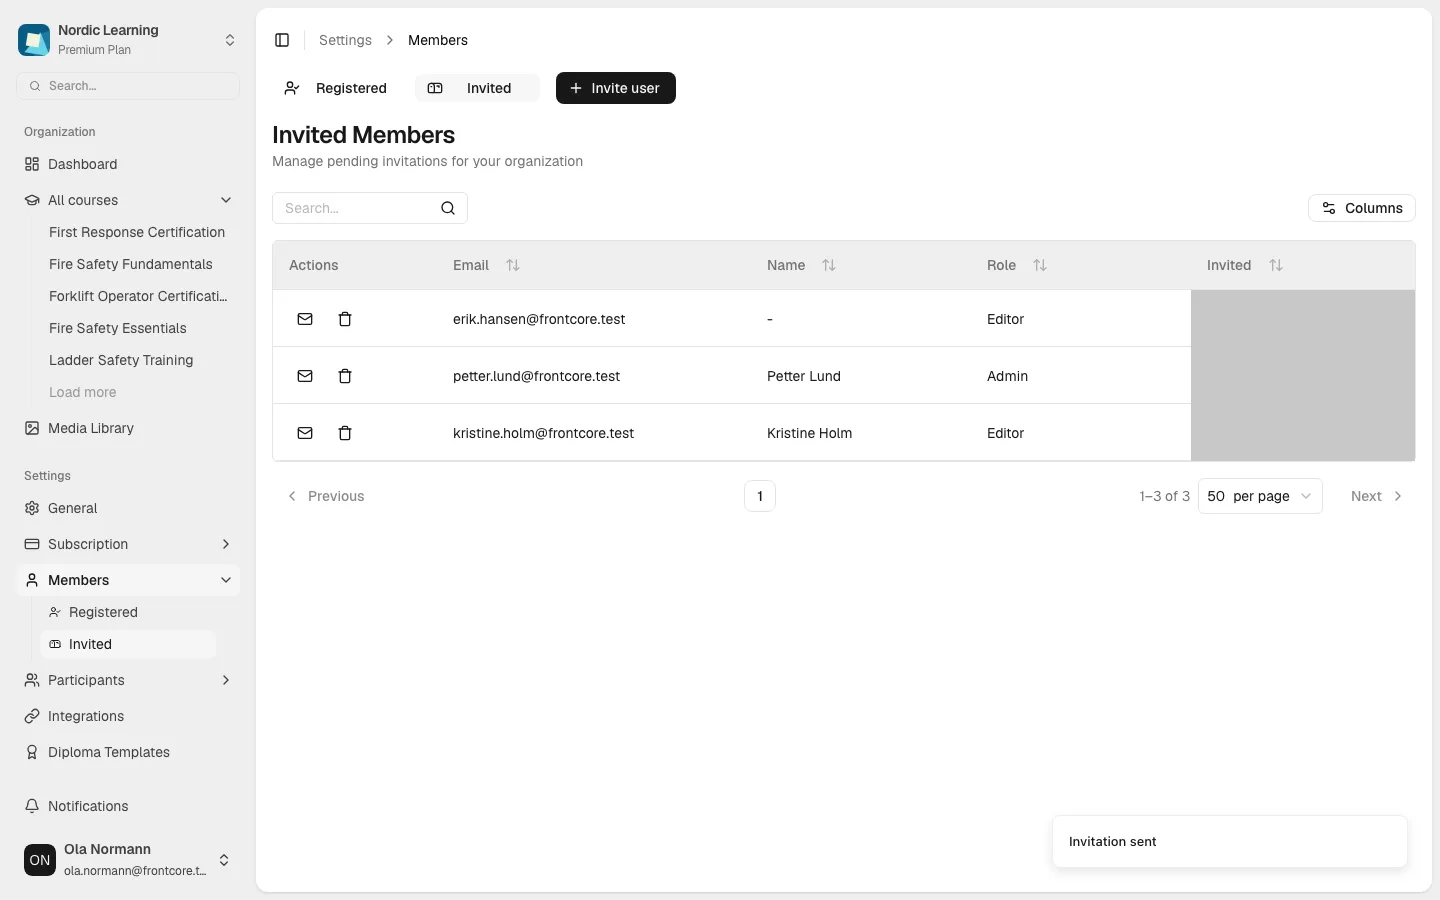
The Invited table lists each pending invitation's Email, Name (shown as "-" — inviting someone through this page doesn't collect a name), Role, and when it was Invited. Two icon buttons sit in the Actions column:
- The envelope icon resends the invitation email.
- The trash icon cancels the invitation, removing it from the list.
Only pending invitations that haven't been accepted appear here.
Change a member's role
- On the Registered tab, click the pencil icon next to the member.
- In the Edit user dialog, change the Role dropdown.
- If you set the role to Admin, a Non-important email notifications switch appears, controlling whether that admin gets emails for routine events like course access requests. In-app notifications aren't affected either way.
- Click Update.
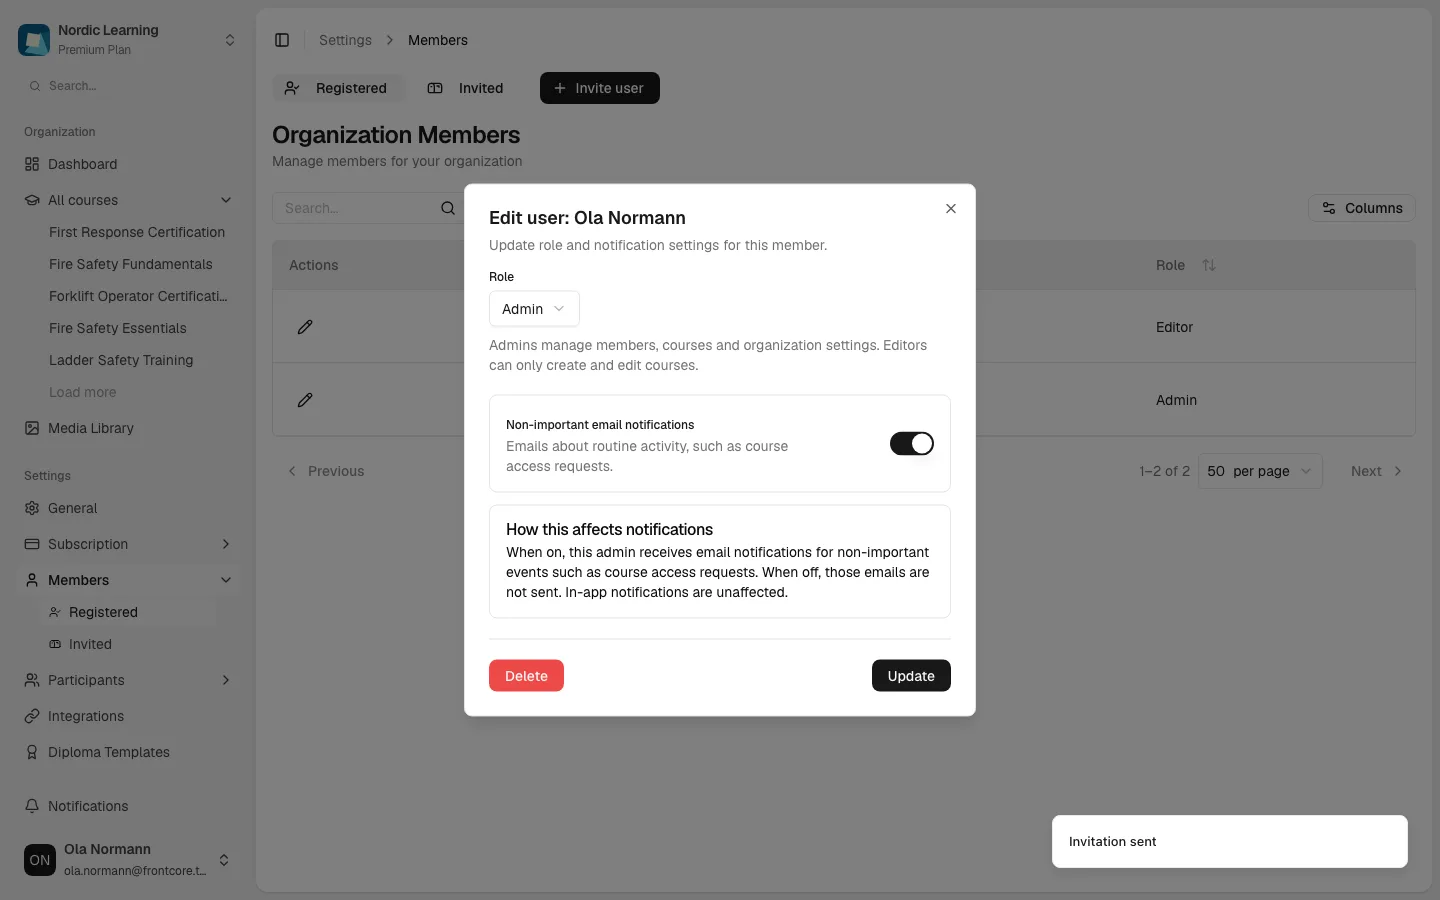
On success you'll see an Updated confirmation.
You can't change your own role, and you can't remove yourself from the organization. Ask another Admin to do it for you.
Remove a member
- On the Registered tab, click the pencil icon next to the member to open the Edit user dialog.
- Click Delete.
- Confirm the browser prompt ("Are you sure?").
The member is removed from your organization, and any instructor assignments they had on the organization's courses are removed along with it. This doesn't delete their FrontCore account or their progress in any courses they're enrolled in as a participant.
Related
- Organization settings
- Manage participants across courses
- Invite and manage course participants
- Manage course instructors
- Upgrade your plan
- Sign in with a magic link
- Troubleshoot signing in
- General FAQ