Create a diploma template
Design a diploma in the diploma editor so FrontCore can automatically issue it when participants complete a course.
A diploma template is the design FrontCore uses to automatically generate a diploma when a participant completes a course. Templates belong to your organization, start as Draft, and are built in a dedicated page-and-element editor — no design tools outside FrontCore required.
Create the template
-
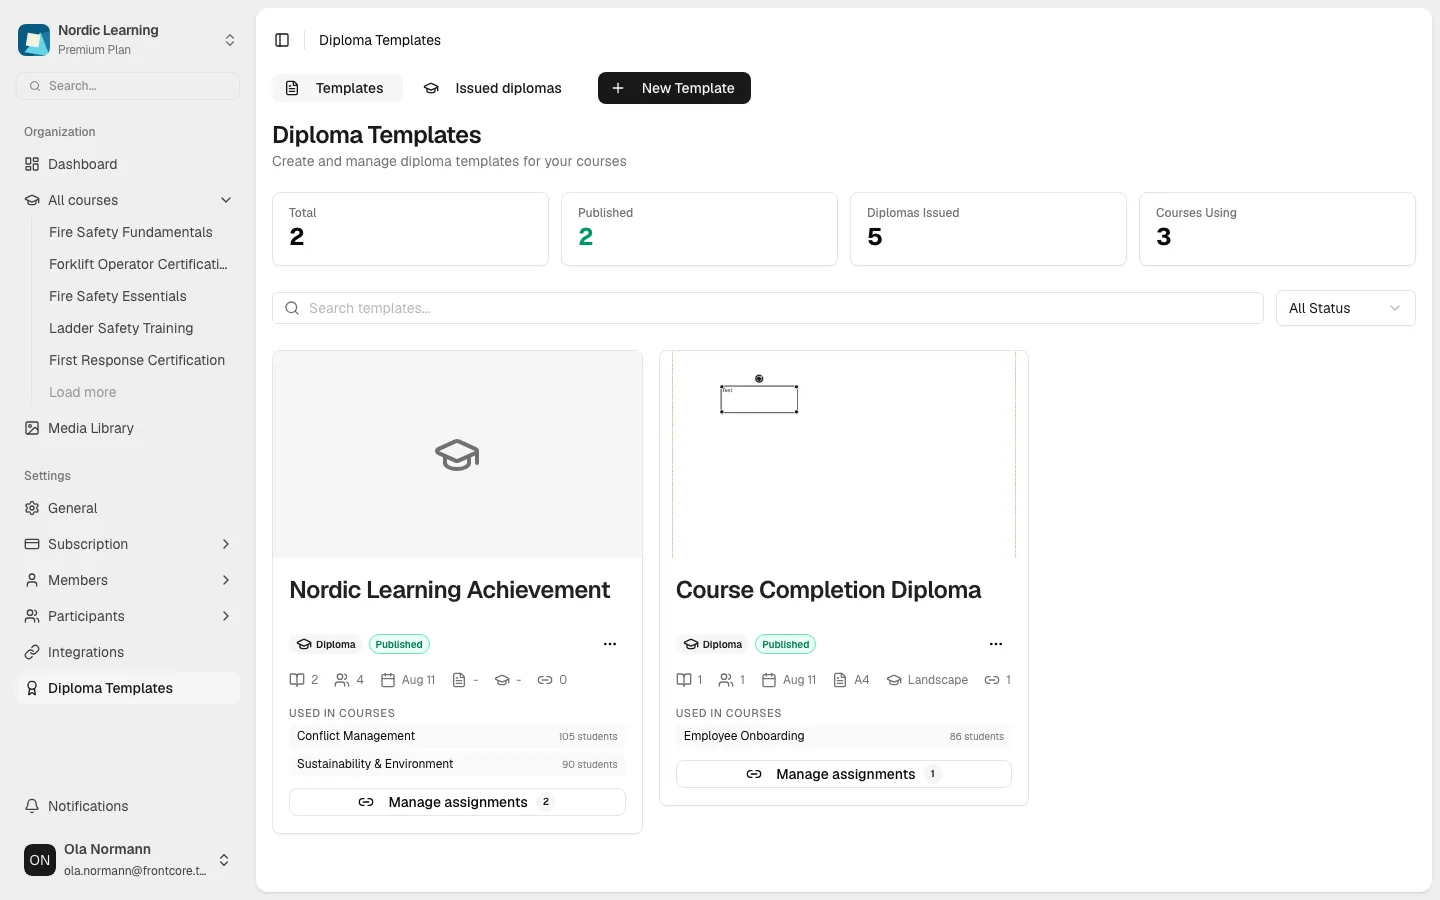
In your organization, go to Diploma Templates.
-
Click New Template.
-
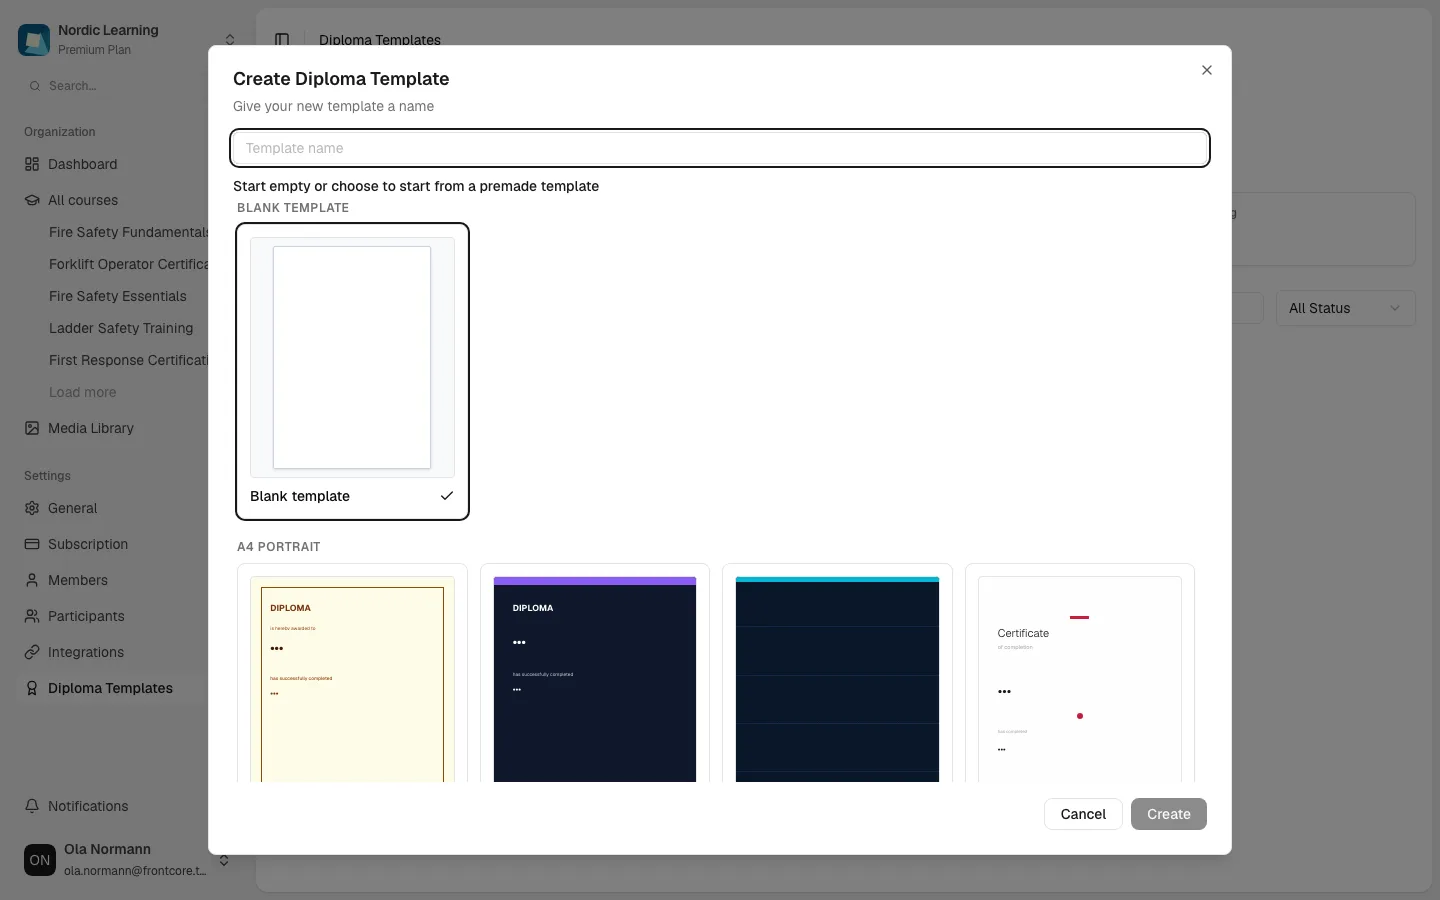
In the Create Diploma Template dialog, enter a Template name (up to 200 characters).
-
Choose Blank template to start with an empty canvas, or pick one of the preset designs below it — presets are grouped by page size and orientation (A4, Letter, or Card, each portrait or landscape). Picking a preset also fills in the name field with that preset's name, which you can still change.
-
Click Create. The button stays disabled until you've entered a name.
You're taken straight into the diploma editor with your new template open.
Design the template in the editor
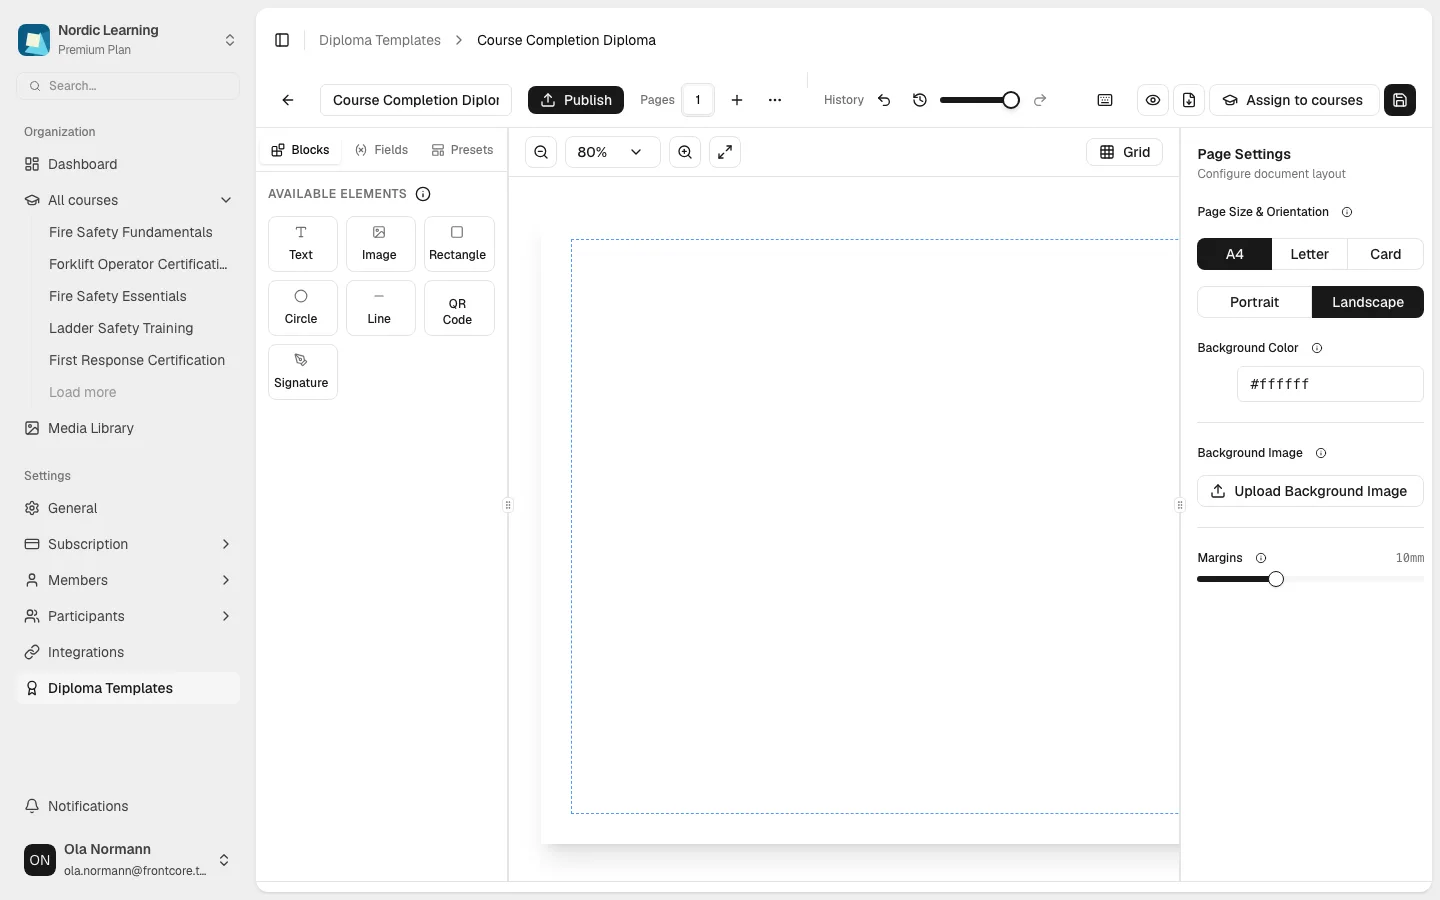
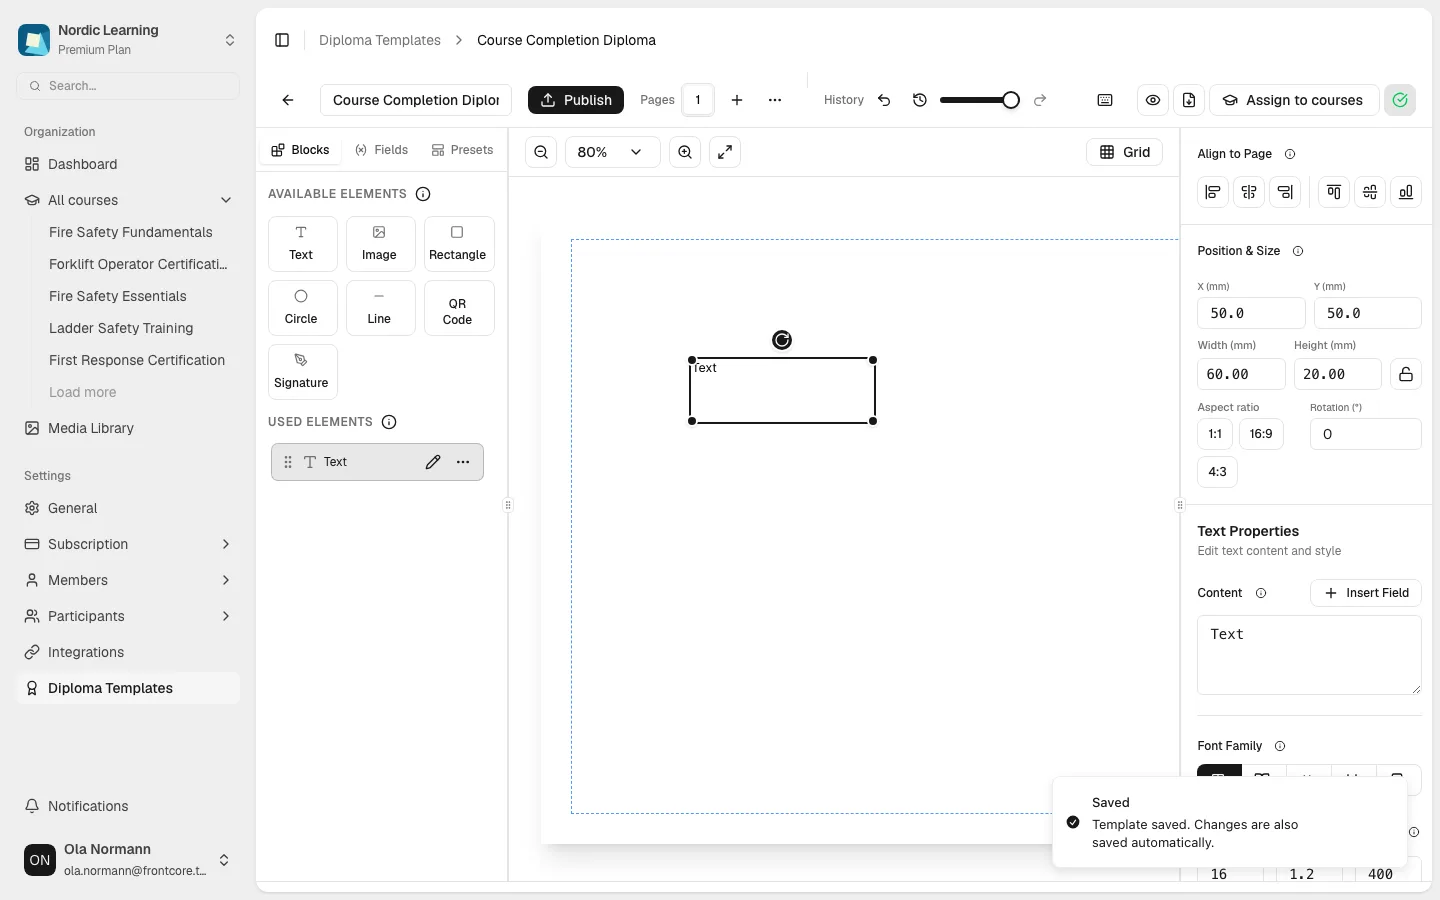
The editor has a top bar, a left sidebar with three tabs, the page canvas in the middle, and a right-hand inspector.
Add elements from the Blocks tab
The left sidebar's Blocks tab lists the elements you can drop onto the page: Text, Image, Rectangle, Circle, Line, QR Code, and Signature. Click one to add it to the canvas, then drag it into place or resize it directly — or use the Position & Size fields in the right-hand inspector once it's selected.
Every element you've added shows up below the block buttons as a row in the Used Elements layer list, where you can reorder (drag the grip handle — the top row renders in front), lock, duplicate, delete, or rename it.
Insert dynamic fields from the Fields tab
Switch to the Fields tab to drop in placeholders that FrontCore fills in per diploma when it's issued:
- Participant — Participant Name, Participant Email
- Course — Course Title
- Organization — Organization Name
- Completion — Completion Date, Completion Score
- Verification — Certificate ID, Verification URL
- General — Today's Date
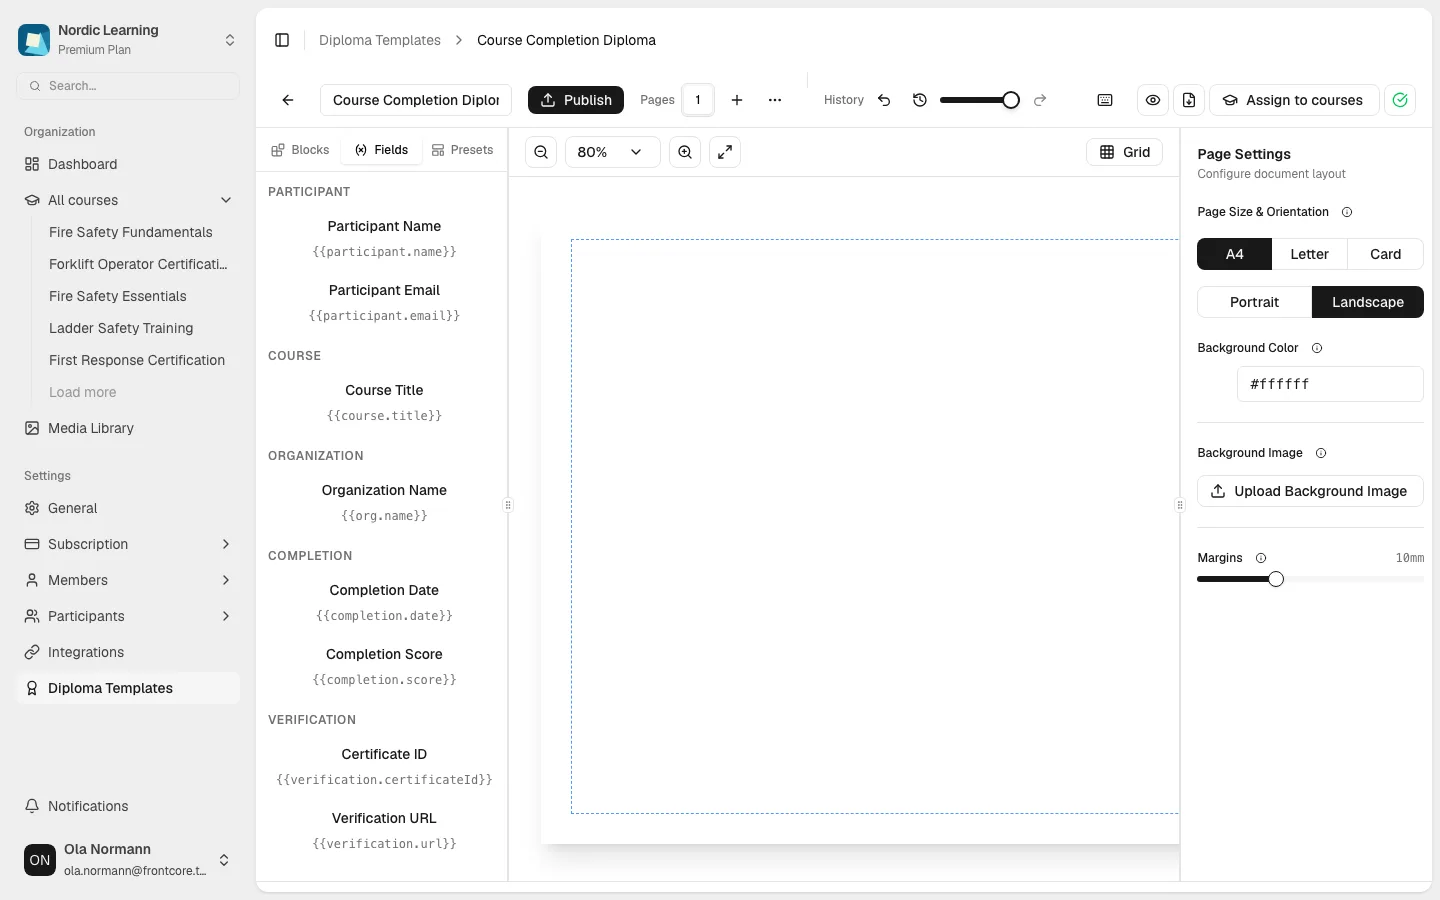
Clicking a field button adds a text element containing that field's placeholder — you can then style, move, or resize it like any other text element.
Configure the page
With nothing selected, the right-hand inspector shows Page Settings:
- Page Size & Orientation — choose A4, Letter, or Card, and Portrait or Landscape.
- Background Color and, optionally, a Background Image you upload (once one is set, you get fit, position, and zoom controls, plus a Replace option).
- Margins, adjustable from 0 to 30 mm.
A template can have more than one page — use the + button next to the page count in the top bar to add one, and the … menu on a page to duplicate, rename, or delete it (deleting is only available once the template has more than one page).
The Presets tab lets you browse and apply a preset design at any point while editing, not just when you first create the template — filter by size and orientation, then click one to apply it. Applying a preset replaces every element currently on the canvas, so use it early or be ready to lose unsaved work.
Save the template
Your edits save automatically a couple of seconds after you stop typing or moving things — you'll see the save indicator in the top bar update. You can also click the save button (or press Ctrl+S) to save immediately; a Saved confirmation ("Template saved. Changes are also saved automatically.") appears once it's done.
Each time you save, FrontCore also takes a snapshot of your current canvas and uses it as the template's thumbnail on the Diploma Templates list — this happens automatically in the background. There's no separate thumbnail upload or file-library selection step.
Next steps
A new template starts as Draft, which means it can't be assigned to a course yet. See Issue and view diplomas to publish your template and assign it to a course, so FrontCore starts issuing it automatically as participants complete that course.
- Give your organization's diplomas a consistent name — the list page shows how many courses and issued diplomas each template has, so a clear name helps you tell them apart later.
- See the FAQ for answers to common questions.